

Allergy Labels for Kids: Safety & Durability Guide 2026
Imagine it's a busy Tuesday morning and you notice the allergy sticker on your child's drink bottle is peeling off, leaving a blurry, unreadable mess. With 1 in 10 infants developing food allergies by their first birthday, the pressure to keep them safe at kindy or school is a constant worry for many parents. You need allergy alert labels for kids that do more than just look pretty. They need to be clear enough for a busy teacher to see at a glance; they must be tough enough to handle the daily wash.
It's stressful wondering if a carer might miss a small or messy alert when you aren't there to supervise. This guide shows you how to protect your child with high-visibility, durable allergy labels that stay put on lunchboxes and drink bottles throughout the school year. We'll explore why our smooth, no-background UV DTF transfers offer a cleaner look than traditional stickers. You will also learn how correct application helps these alerts survive the rigours of the classroom and regular washing without losing their vibrant finish.
Key Takeaways
- Understand how high-visibility alerts help relief teachers and kindy staff prevent cross-contamination during busy meal times.
- Learn why the "no-background" finish of UV DTF technology offers superior durability compared to traditional stickers that often peel at the edges.
- Discover the best strategic placements for allergy alert labels for kids, including why the lid of a drink bottle is often more effective than the side.
- Master the "Clean, Position, Press, Peel" application method to ensure your personalised alerts stay put throughout the entire school year.
- Find out how to customise your medical alerts with specific icons that make identification easy for carers and children alike.
Why Clear Allergy Alert Labels are Essential for School and Kindy
Morning tea in a New Zealand kindy is often a whirlwind of activity. Lunchboxes are snapped open, snacks are swapped, and children are constantly on the move. In this high-energy environment, preventing cross-contamination isn't just about what's inside the container; it's about how clearly that container speaks to the adults in the room. Clear communication is the first line of defence against accidental exposure.
Relief teachers and casual staff often step into classrooms without knowing every child's medical history. While a school usually has an action plan on file, a visual reminder right on the lunchbox provides a critical safety net. For a deeper look at the medical side of these sensitivities, you can check this comprehensive guide to food allergies to see why rapid identification is so vital. Using allergy alert labels for kids ensures that even someone who has never met your child can immediately see which foods are off-limits.
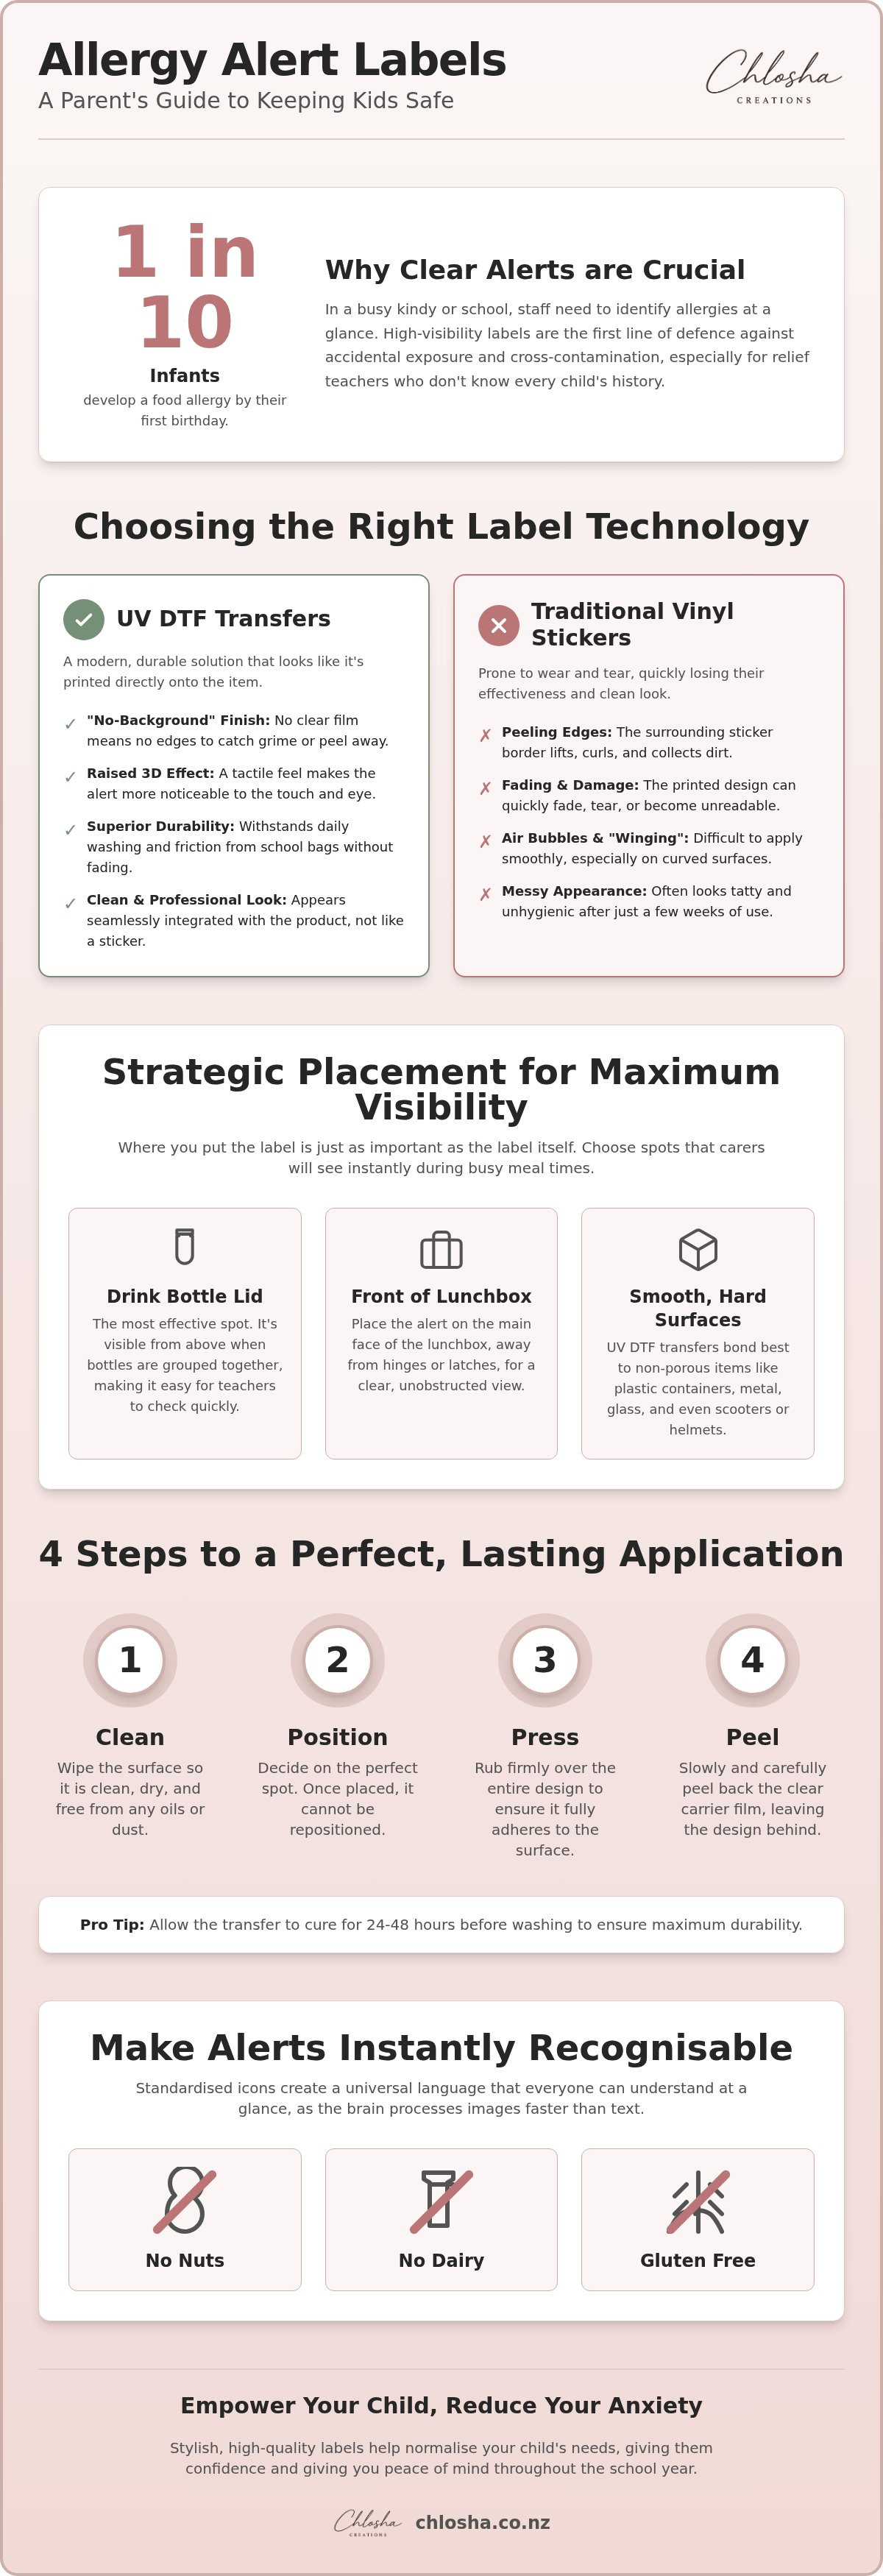
Standardised icons are a key part of this safety strategy. We use bold, recognisable symbols for dairy, nuts, and gluten because the brain processes images faster than text. When a teacher sees a bright nut icon with a red strike-through, the message is instant. It creates a universal language that everyone in the school environment can understand at a glance.
The Busy Classroom Environment
Think about the last time you tried to read a faded name scrawled in permanent marker on the bottom of a drink bottle. It's nearly impossible to see, especially when the bottle is wet or the marker has rubbed off over time. High-visibility colours like bright orange or red serve as a psychological "stop" signal. This is especially important for non-verbal children or toddlers in daycare who can't yet advocate for their own safety. A clear, raised decal on the lid or side of a bottle provides an immediate alert. Our UV DTF transfers offer a clean, no-background finish that stands out against colourful gear without looking like a messy, clinical sticker.
Empowering Your Child
Safety gear shouldn't make a child feel like an outsider. By using stylish, personalised name labels that include allergy alerts, you help your child take ownership of their belongings. It normalises their needs rather than highlighting them as "different." When their peers see a cool, high-quality label, it reinforces the "no sharing" rule in a way that feels respectful. This approach reduces "allergy anxiety" for both you and your child. It gives them a visual tool they can point to, making them feel more confident and secure while they're away from home.
Choosing the Right Labels: UV DTF vs Traditional Stickers
Why do most name labels start to look tatty after just one term? It usually starts at the edges. Standard vinyl stickers have a clear or white adhesive border that surrounds the design. Over time, that edge catches lint from school bags and residue from the sink, leading to the dreaded "sticker lift." This is where allergy alert labels for kids made with UV DTF technology really stand out. These transfers are built to handle the constant "in and out" of a stuffed school bag, where friction against books and jumpers usually spells the end for lesser stickers.
UV DTF (Direct-to-Film) isn't a traditional sticker. It's a premium transfer process that applies a smooth, raised design directly to your gear without any surrounding background. The result is a clean, professional finish that looks like part of the product. Because there's no clear film around the alert, there are no edges to catch, curl, or peel. This makes them a much more reliable choice for long-term safety alerts on items that get used every single day.
The "No-Background" Advantage
The absence of a sticker border does more than just look sleek; it prevents the buildup of grime that often makes old labels look unhygienic. This is a critical factor for items like lunchboxes and drink bottles that are handled constantly throughout the day. Our UV DTF transfers also feature a unique 3-D raised effect. This tactile finish makes the allergy alert more noticeable to the touch and the eye, providing an extra layer of awareness for carers. These transfers bond beautifully to various smooth, hard surfaces, including:
- BPA-free plastics and acrylics
- Glass jars and bottles
- Smooth metal surfaces
- Hard-shell lunchboxes
Material Comparison for Parents
When comparing materials, it's helpful to look at how they handle curves and moisture. Traditional vinyl can sometimes "wing" or pop up on tightly curved drink bottles because the stiff film wants to straighten out. In contrast, the ink-and-gloss layers of a UV DTF transfer are thin and flexible, allowing them to follow the contours of the bottle more naturally. To help you choose, here is how the common options stack up:
- UV DTF: Raised 3-D finish, no background, highly flexible on curved surfaces.
- Vinyl Stickers: Flat finish, clear or white background, prone to edge-peeling over time.
- Paper Labels: Flat, not water-resistant, prone to tearing and smudging.
We believe in being honest about longevity. No label is completely indestructible or "permanent" in every situation. Factors like the texture of the surface and how well the label was applied play a big role. However, for parents seeking a premium, long-lasting solution that stays looking fresh, our personalised name labels provide a durability that standard stickers simply can't match.
The Ultimate Labelling Checklist: Where to Place Allergy Alerts
Choosing high-quality allergy alert labels for kids is a great first step. However, where you stick them matters just as much as what they say. In a bustling school or kindy environment, a teacher might only have seconds to check a container. If the alert is hidden on the bottom of a bottle or tucked under a handle, it might be missed entirely. You want the warning to be the first thing someone notices when they reach for your child's gear.
For a cohesive and organised look, many parents choose to coordinate these alerts with their personalised name labels NZ. This creates a uniform system where every item is clearly marked with both a name and a safety warning. For high-risk items like Epipen cases or Ventolin spacers, we suggest a "Double-Label" strategy. Place one large alert on the outside of the protective case and a second, smaller one directly on the medical device inside. This ensures the information is always present, even if the device is removed from its holder during an emergency.
Lunchboxes and Drink Bottles
When labelling a bento box, don't just stop at the outer lid. You should label the individual snack containers inside too. If a child takes a small pot of fruit or crackers to a shared table, that pot needs its own alert. For drink bottles, we always recommend placing the transfer on the lid rather than the base. Side pockets on backpacks often hide the lower half of a bottle; the lid usually remains visible at all times. This placement ensures the alert is seen as soon as the bottle is pulled from the bag.
Bags, Hats, and Stationery
Medical alerts shouldn't be confined to food containers. Using personalised bag tags for school NZ provides an external signal to staff before they even open a backpack. This is particularly helpful for relief teachers who need to identify which bag contains emergency medication at a glance. Sunhats and spare clothes bags also benefit from a clear alert. It's a simple way to remind supervisors of specific needs during outdoor play or messy activities. In primary school, shared stationery kits and tech gear like tablets are common. Placing a discreet alert on these items prevents accidental cross-contamination if a child has a contact allergy, keeping the "no sharing" rule front of mind for everyone.
How to Apply and Care for Your Personalised Allergy Labels
Applying your new allergy alert labels for kids is a straightforward process, but taking a few extra minutes at the start ensures they stay looking great for the whole school year. Because UV DTF transfers bond to the surface differently than a traditional sticker, the initial application is the most important part of the journey. If you follow our simple "Clean, Position, Press, Peel" method, you will achieve a professional, no-background finish that looks like it was printed directly onto your child's gear.
Surface Preparation Tips
The secret to a long-lasting bond is a perfectly clean surface. Any leftover oils from your hands, dust, or residue from the dishwasher will prevent the adhesive from gripping properly. We recommend cleaning the area with a bit of rubbing alcohol or warm, soapy water. If you use soap, make sure to rinse it thoroughly and dry the surface completely with a lint-free cloth. Moisture is the enemy of a good bond.
It's also important to check the material of your lunchbox or drink bottle. UV DTF transfers work best on smooth, hard surfaces like glass, metal, and hard plastics. You should avoid applying them to silicone, fabric, or heavily textured surfaces, as the adhesive won't have enough flat area to grab onto. Some plastics, like polypropylene, are "low-surface-energy," which just means they are naturally a bit slippery. For these items, you might need to apply a bit more pressure during the "Press" stage to ensure the transfer is fully seated.
Curing and Washing Guidelines
Once you have applied your transfer, patience is key. While the item is technically ready to use almost immediately, the adhesive needs time to "cure" and reach its full strength. We suggest following the 24-hour rule: let the label sit at room temperature for a full day before sending it off in a school bag. This allows the bond to stabilise against the daily bumps and friction of school life.
When it comes to cleaning, the 72-hour dishwasher rule is vital. Do not submerge the item or put it through a wash cycle for at least three days. Even after this time, hand-washing is always the gentlest way to care for your kids name labels. If you do use a dishwasher, place the item on the top rack and avoid high-heat "sanitise" cycles, as extreme temperatures can eventually soften the adhesive over time. By following these simple care steps, you ensure your safety alerts remain vibrant and clear for the long haul.
Ready to get your child's gear organised for the new term? Browse our full range of durable personalised name labels to find the perfect style for your family.
Keeping Your Little Ones Safe with Chlosha Creations
Managing a household with allergies is a big job. We understand the mental load that comes with checking every food label and briefing every new carer or teacher. That's why we designed our Allergy & Medical range to be a practical, helpful partner in your daily life. Our allergy alert labels for kids aren't just functional; they're created with the same care and attention to detail that you put into your child's safety every day. We want to help you feel confident that your child's needs are clearly visible, even when you aren't there to speak for them.
Families managing multiple children with different requirements often find our Sibling Packs to be a lifesaver. You can mix and match icons within a single order, making it easy to kit out the whole family's lunchboxes and drink bottles without needing to buy multiple separate sets. It is a simple, cost-effective way to keep everyone's gear sorted and safe while maintaining that clean, professional look across all your containers.
Personalised for Every Need
We offer a wide variety of high-visibility icons for the most common triggers, including nut-free, dairy-free, egg-free, and gluten-free options. But we don't stop at food. Our range includes medical alerts for conditions like asthma and diabetes, ensuring that essential health information is always visible on spacers or testing kits. You can even combine these vital alerts with personalised icons and name labels to create a fun look that your child will genuinely love. It's about making safety feel like a normal, stylish part of their gear rather than something clinical or different.
Supporting Local
Chlosha Creations is a family-run business based right here in Auckland. We take immense pride in our craftsmanship and the premium UV DTF finishes we provide. When you shop with us, you're supporting local creators who truly understand the rigours of the NZ and AU school environment. We know how much wear and tear a lunchbox goes through in a Kiwi playground.
We offer national shipping across New Zealand, and for our local Auckland families, we have the added convenience of local pickup. Our commitment is to provide modern, durable, and stylish labelling solutions that give you peace of mind. We are here to help you stay organised and keep your little ones safe with products that are built to last the whole school year. Feel free to explore our range and find the perfect fit for your family's needs.
Ready for a Safer School Year?
Getting your child ready for the new term involves more than just buying the right gear; it's about making sure that gear helps keep them safe. We've seen how strategic placement on drink bottle lids and using high-visibility icons can significantly reduce the risk of accidental exposure. By choosing premium UV DTF transfers, you get a clean, no-background finish that handles the daily friction of a busy classroom much better than traditional stickers.
As a family-run business based in Auckland, we take pride in supporting families across New Zealand with reliable, locally made solutions. Our allergy alert labels for kids are trusted by parents for school and daycare prep because they combine practical durability with styles children actually want to show off. Take the stress out of morning tea and lunch breaks by kitting out your child's containers with alerts that stay put.
Ready to get organised? Shop our Allergy & Medical Label range today and give yourself that extra peace of mind. We're here to help you make every school day a little bit safer and a lot more organised.
Frequently Asked Questions
Are allergy alert labels for kids truly dishwasher safe?
Our UV DTF transfers are designed to handle regular cleaning, but we don't call them "dishwasher-proof" because longevity depends on heat and detergent. For the best results, always wait at least 72 hours after application before the first wash. This gives the adhesive time to bond fully. When you do use a dishwasher, stick to the top rack and avoid high-heat sanitise cycles to keep the 3-D finish looking sharp.
What is the best way to label a lunchbox for a child with a peanut allergy?
Visibility is everything for a peanut allergy. Place a large, high-contrast nut icon directly on the main lid of the lunchbox so it's the first thing a teacher sees. If you use a bento-style box, it's a great idea to add smaller allergy alert labels for kids to the individual snack pods inside. This ensures the warning stays with the food even if the main lid is set aside during eating.
Can I use these labels on fabric items like school bags or sunhats?
These specific UV DTF transfers are designed for hard, smooth surfaces and won't bond properly to fabric. For school bags, we recommend using one of our personalised bag tags, which can be easily clipped to a zip for a visible medical alert. For sunhats or spare clothes, a bag tag or a dedicated fabric-safe solution would be better, as our decals need a non-porous surface to grip.
How long do UV DTF allergy labels typically last on a drink bottle?
While we don't claim they are indestructible, most parents find our labels last the entire school year when applied to a clean, smooth surface. Their durability on a drink bottle depends on how often it's washed and how it's handled in a school bag. The "no-background" design helps by removing edges that could catch and peel, keeping the alert clear and vibrant through daily use and regular rinsing.
What information should I include on a medical alert label for school?
A clear medical alert should include your child's name and a bold icon representing the specific allergen, such as a crossed-out milk bottle or peanut. Including a simple "No Sharing" message can also be very helpful for younger children in kindy. Keep the text brief and the font large; teachers need to be able to read the essential safety information from a distance in a busy classroom.
Will these labels leave a sticky residue if I need to remove them?
Our transfers are designed to stay put, but if you need to remove them, they generally won't leave a thick, sticky mess behind. If a little residue remains on a plastic lunchbox or glass bottle, a quick wipe with warm soapy water or a bit of rubbing alcohol usually does the trick. Because they have no clear background film, there is no large adhesive area to deal with, making the process much cleaner.
How many labels do I need for a typical school year?
For a typical school year, we suggest having at least 10 to 15 allergy alert labels for kids on hand. This allows you to cover the essentials like a main lunchbox and drink bottle, while leaving spares for snack containers, bento inserts, and medical kits. It's always handy to have a few extras in the drawer just in case your child gets a new bottle or a different container mid-term.
Are there specific colours that are better for allergy alerts?
High-contrast colours are definitely the best choice for safety alerts. Red, bright orange, and yellow are universal "caution" signals that naturally draw the eye. We use these bold shades in our medical range to ensure the alert stands out against the colour of the lunchbox or bottle. The goal is to create an immediate visual "stop" for any adult or peer who might be handling your child's food.
