

Custom Pantry Labels NZ: Allergy & Safety Buying Guide
What if the most important safety information in your kitchen is currently unreadable because a cheap sticker is peeling off? It's a common frustration for Kiwi parents. You spend time organising, yet those vital warnings for peanuts or gluten often end up as a sticky, blurry mess after one round in the dishwasher. Whether you are prepping for a new term at kindy or tidying the home cupboards, finding high-quality custom pantry labels nz families can rely on is about safety first.
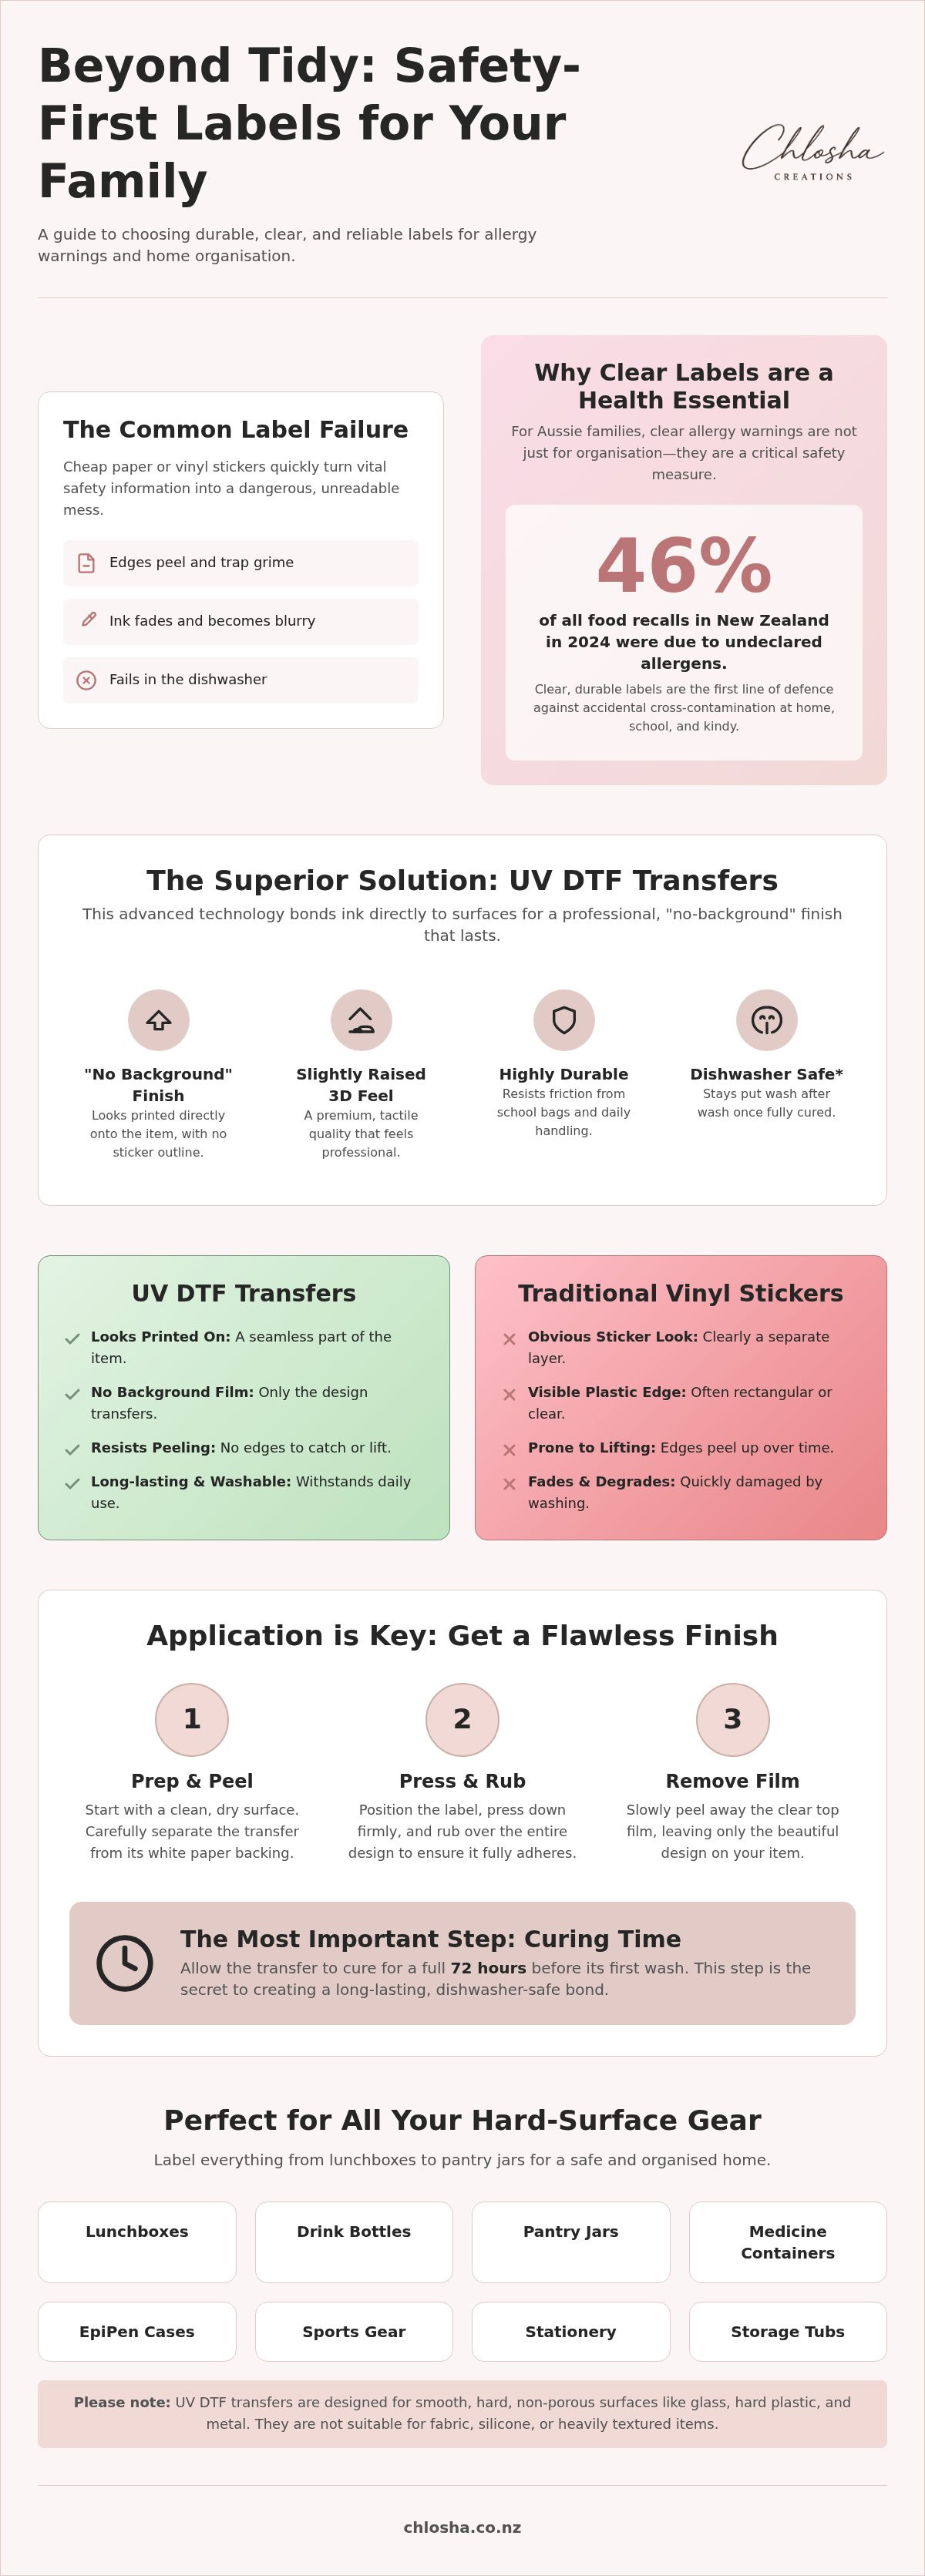
We understand the stress of making sure a teacher or another parent spots an allergy warning instantly. In 2024, allergens were the leading cause of food recalls in New Zealand, accounting for 46% of all cases. It's a serious business. This guide will help you choose durable, high-contrast labels that offer a sleek, "no-background" look while keeping your family safe at home and on the go.
You'll learn how to apply personalised safety transfers for a premium, slightly raised finish that won't budge. We'll walk through the latest labelling standards and why a 72-hour curing time is the secret to a long-lasting, dishwasher-safe result. It's time to swap the guesswork for total peace of mind in the pantry and the lunchbox.
Key Takeaways
- Understand how custom pantry labels nz families trust can prevent cross-contamination and clearly communicate allergy needs to kindy staff.
- See why UV DTF technology offers a superior "no-background" look that feels printed directly onto your glass and plastic containers.
- Learn how to match label sizes to your gear, ensuring "Mega" labels for lunchboxes and "Mini" options for small cutlery are always visible.
- Get the best results by following a simple application method and allowing a 72-hour curing time before the first dishwasher cycle.
- Explore safety-first label packs designed with high-contrast colours and icons to make vital health information impossible to miss.
Why Custom Pantry Labels in NZ Are a Safety Essential
Is your pantry just tidy, or is it actually safe? While many people think of labels as a way to make a kitchen look "Pinterest-ready", for families dealing with severe reactions, it's a matter of health. Using high-quality custom pantry labels nz parents trust helps create a clear boundary between safe snacks and potential risks. Decorative labels focus on the font style; functional safety labels focus on being seen. By using high-contrast colours like bright red or bold pink, you ensure that a risk is identified before a container is even opened. This visual shorthand is a vital part of understanding food allergies and managing them in a busy household where multiple people might be reaching for the crackers.
Organising for Allergies and Medical Needs
In a shared environment like a school or kindy, clarity saves lives. Relief teachers or support staff might not know your child’s specific needs by heart. Clear text paired with recognisable icons allows them to identify a "No Dairy" or "Nut Free" container in seconds. It's not just about the food, either. Labelling "care essentials" like EpiPen cases and medicine bottles ensures they are found quickly in an emergency. At home, you can use these labels to designate a "safe zone" on a specific shelf. This simple physical barrier, backed by clear signage, prevents accidental cross-contamination during the morning school lunch rush.
The Practicality of Personalised Safety Info
Why settle for a generic "Allergy" sticker? Generic options often lack the specific details needed for complex medical requirements. A personalised approach allows you to integrate your child's name directly with their specific allergy info. This creates a single, unmistakable point of truth on their lunchbox or drink bottle. It's much harder for a container to get swapped when the name and the warning are part of the same design. If you want to make safety feel a bit more approachable for your little ones, you can choose from various themed options. You can find these in our range of personalised icon name labels nz, which blend fun designs with serious safety functions. Choosing the right custom pantry labels nz families can rely on means your labels won't peel off in the wash. Because our UV DTF transfers are durable, they stay put as long as you allow the 72-hour curing time before the first dishwasher cycle.
UV DTF Technology: The Secret to Long-Lasting Safety Labels
If you've ever dealt with traditional vinyl stickers, you know the drill. They look great for a week, then the edges start to lift. Soon, dust and lunchbox crumbs get trapped under the adhesive, and the label looks tatty. This is where UV DTF technology changes things for custom pantry labels nz families. UV DTF stands for Direct to Film. It uses a process where ink and a protective varnish are cured with ultraviolet light. Instead of a plastic sheet with a sticky back, you're applying a high-quality transfer that bonds directly to the surface. It’s a cleaner, more robust way to manage safety info.
The most striking difference is the "no-background" finish. When you apply these transfers to your glass jars or plastic containers, there is no visible film around the letters or icons. The design looks like it was printed directly onto the item at the factory. You also get a slightly raised, 3D tactile feel. This adds a premium touch that you can actually feel with your fingertips, making it easier to identify specific containers in a hurry. Custom pantry labels nz users love how this finish stays crisp even with daily use. Just remember, these are designed for hard, smooth surfaces. They are perfect for glass, metal, and hard plastics, but they won't work on fabrics or silicone lunchboxes.
The Durability Factor for Busy Families
Busy Kiwi households need gear that stands up to a bit of a thrashing. School bags are a high-friction environment. Lunchboxes get shoved in and pulled out multiple times a day. Traditional stickers often fail because their background film catches on the bag's lining, leading to peeling. Because UV DTF transfers lack that extra film, there is nothing for the bag to catch on. They stay flush against the surface. To see how these durable designs look in action, you can browse our range of UV DTF transfers New Zealand families rely on. Just be sure to give them a 72-hour curing time before they go through the dishwasher to ensure the bond is set for the long haul.
Aesthetic Meets Functionality
Safety doesn't have to look industrial. You can achieve a professional, sleek look on your glass pantry jars and metal drink bottles without the bulk of paper labels. Paper or cheap plastic stickers often collect grime around the edges over time. These transfers offer a smooth finish that stays clean and hygienic. This is particularly important when you consider New Zealand's allergen labelling laws, which require clear and accessible information for consumers. Modern families are moving away from messy, temporary solutions toward these clean transfers that blend safety with style. If you're ready to upgrade your organisation, you can explore our personalised name labels to find a design that fits your home perfectly.
Selecting the Right Safety Labels for Your Gear
Picking the right label is about more than just choosing a pretty font. You need to think about where the label is going and who needs to see it. When selecting custom pantry labels nz families can rely on, the first step is checking your container material. Our UV DTF transfers bond beautifully to glass, stainless steel, and hard plastics. However, they won't stick to silicone or those heavily textured "frosted" plastics. If the surface feels oily or rubbery, the transfer cannot create that firm grip it needs to stay put.
Visibility is your next priority. For medical alerts, high-visibility colours like red or white are best. They stand out against most lunchbox colours and pantry jars, ensuring a quick glance is all it takes to spot a warning. Adhering to global food safety standards is a best practice even at home; clear communication reduces the risk of accidental exposure. Avoid the mistake of choosing a colour that blends too well with the container. Safety info needs to pop.
Sizing Your Safety Labels for Maximum Impact
Size matters when it comes to being noticed. A "Mini" label is perfect for a teaspoon or a small medicine syringe, but it will get lost on a large storage bin. For those big items or even gear like scooters and helmets, the Mega Name Pack is the way to go. It offers the boldest presence for maximum awareness. If you are just starting out with school gear, the Classic Name Pack with 12 labels is a great all-rounder for drink bottles and lunchboxes. You can find a full breakdown of dimensions in our Ultimate Guide to Personalised Name Labels in NZ.
Surface Compatibility Check
Not all plastics are created equal. Some, like polypropylene, are "low-surface-energy" plastics. These can be trickier for any adhesive to stick to. To get the best bond, always start with a surface that is completely clean and dry. A quick wipe with rubbing alcohol can remove invisible oils from your hands that might interfere with the transfer. This attention to detail is why our transfers are such a popular premium alternative to traditional labels for hard gear. You get a professional, printed-on finish that won't lift at the edges like standard stickers often do. Just remember to let the bond set for 72 hours before the first wash.
How to Apply Your Labels for a Professional Finish
Want that perfect, factory-finish look for your custom pantry labels nz? It’s easier than you think. The secret lies in the preparation and a little bit of patience. Our UV DTF transfers are designed for a seamless bond, but they need a clean canvas to work their magic. Applying your labels shouldn't feel like a high-stakes craft project. With our technology, you’re getting a premium transfer that looks like it is part of the container itself.
Step 1: Clean and Dry. Use a lint-free cloth and a bit of rubbing alcohol to wipe down your glass or plastic. Any oil from your fingers can weaken the bond. Make sure it is bone-dry before you proceed. Even a tiny bit of moisture can stop the adhesive from gripping properly.
Step 2: Position and Press. Take your time here. Once the transfer touches the surface, it is going to want to stay there. Lay it down carefully. Use a squeegee or even a credit card to press firmly across the entire design. You want to push out any tiny air bubbles to ensure a smooth finish.
Step 3: Peel Slowly. This is the satisfying part. Peel the clear carrier sheet back at a very low angle, almost flat against the surface. If any part of the design lifts, just lay it back down and give it another firm rub with your card before trying again.
Step 4: The Hair Dryer Trick. Dealing with a curved drink bottle or a tricky jar? Use a hair dryer on a low, warm setting for a few seconds. This softens the transfer just enough to help it hug those contours perfectly. It makes a world of difference on rounded gear.
The Critical Curing Times
Patience is a virtue when it comes to durability. While your item looks ready to go immediately, the adhesive needs time to set. Wait at least 24 hours before you start normal handling of the item. The big one is the 72-hour rule. Do not put your containers in the dishwasher until three full days have passed. This ensures the bond is strong enough to handle the heat and water pressure. Longevity depends on the surface and how much friction the label faces, but following these steps gives your custom pantry labels nz the best possible start.
Maintenance Tips for Busy Parents
We know life is busy, but a little care goes a long way. While our labels are tough, hand-washing is the safest bet to ensure they look great for years. If a corner ever starts to lift, it is usually because of a speck of dust during application. You can often press it back down, but preventing it with a clean surface is key. Need to change things up? Removing old labels is simple. Gently peel them away; you won’t find the sticky, gross residue that paper stickers leave behind. It is a clean break every time.
Ready to transform your kitchen? Explore our personalised name labels to find the perfect style for your next organising project.
Standout Picks: The Allergy & Info Labels Collection
Finding the right fit for your home shouldn't feel like a compromise between safety and style. Our collection is designed to bridge that gap. For those high-stakes situations where a warning must be seen instantly, the Pink, Red, and White Personalised Allergy Alert Label Packs are the top choice. At NZ$ 19.9, these packs provide the high-contrast visibility needed for school and kindy environments. If you prefer a more subtle look for your own kitchen, the Cream and Brown packs offer a softer aesthetic. They still provide the same durable UV DTF finish but blend more naturally with a modern home pantry. It's the perfect way to integrate custom pantry labels nz families use to stay organised without sacrificing the look of your kitchen.
Personalised Allergy Icon & Text Packs
Sometimes, a picture says it all. Our Pack A includes 6 icons and 2 name stickers, each measuring a compact 2.5cm wide. These are fantastic for lunchbox lids or drink bottle caps where space is tight. The icons act as a quick visual cue for busy teachers during snack time. You can explore the full range in our icon name packs to find the specific symbols that match your child's needs. Because these transfers have no background, they look as if they were printed directly onto the lid. This is a huge step up from standard stickers that often look bulky or cheap. The slightly raised texture also makes them easy to find by touch, adding another layer of accessibility for your little ones.
Comprehensive Safety Packs for School
If you need to include more than just a name, Pack B is your best friend. These stickers are larger, measuring 9.5 x 2.5cm, which allows for more detailed instructions or larger text. This is ideal for items that might be handled by multiple staff members throughout the day, ensuring the message is impossible to miss. For families managing multiple allergies, the A3-Allergy Alert 4 Icon Pack (NZ$ 12.9) offers incredible versatility. It allows you to group different warnings together in one clear, professional-looking transfer. For more inspiration on how to keep your household running smoothly with custom pantry labels nz, take a look at our best sellers. Just remember to allow that 72-hour curing period before your first dishwasher cycle. This ensures the bond is set for the long haul, keeping your safety gear clear and readable for years to come.
Secure Your Safe and Organised Kitchen Today
We’ve explored why moving beyond standard stickers to premium UV DTF transfers is a vital step for any Kiwi home managing allergies. By choosing a no-background, printed-on look, you ensure that vital safety info is always legible and never peeling. It’s about giving yourself peace of mind during the morning rush and ensuring kindy staff have the clear cues they need. When you choose custom pantry labels nz families trust, you aren't just buying a sticker; you're investing in a durable solution from an Auckland-based family business.
Our premium finish provides a slightly raised, 3D effect that looks professional on every surface, from glass jars to stainless steel lunchboxes. Now that you know how to select the right size and apply your transfers for a lasting bond, you are ready to transform your space. It's time to create a kitchen that is as safe as it is beautiful. Shop the full Allergy & Info Labels collection here and take the first step toward a more organised home. We can't wait to see your pantry transformation!
Frequently Asked Questions
Are these allergy labels permanently waterproof?
These labels are highly durable and water-resistant, but we don't describe them as permanently waterproof. Once they have finished the 72-hour curing process, they can withstand regular washing and daily use on drink bottles and lunchboxes. They are designed to stay crisp and readable through many cycles, provided you follow the application steps. For the best longevity, we recommend hand-washing your items whenever possible to keep the finish looking its best.
Can I use these labels on my child’s silicone lunchbox?
Our UV DTF transfers will not bond to silicone or flexible, soft plastics. They require a smooth, hard surface like glass, metal, or rigid plastic to create a secure grip. If your child has a silicone lunchbox, the label will likely peel off almost immediately. We suggest applying your custom pantry labels nz to the hard plastic lids or stainless steel bases of food containers instead for a reliable, long-lasting finish.
How long do I need to wait before putting a labelled bottle in the dishwasher?
You must wait 72 hours before exposing your labelled items to a dishwasher cycle. This timeframe allows the adhesive to fully cure and create a robust bond. If you wash the item too early, the heat and moisture can cause the edges to lift or the transfer to fail. For normal handling, a 24-hour wait is sufficient, but that three-day rule is essential for ensuring your safety labels remain intact.
What is the difference between UV DTF and standard vinyl stickers?
The main difference is the finish and the lack of a background film. Standard vinyl stickers have a visible border that can catch on bags and peel. UV DTF transfers are printed onto a film and then transferred, leaving only the ink and varnish on your item. This creates a sleek, "printed-on" look with a slightly raised 3D texture that feels premium and resists the friction of daily school life much better than vinyl.
Will these labels leave a sticky residue if I want to remove them later?
No, these transfers are designed to peel away cleanly without leaving the gross, sticky residue often associated with paper stickers. If you need to update a medical warning or change a name, you can gently lift the edge of the transfer and remove it. While they are built to be durable, they don't use the same aggressive adhesives that ruin the surface of your containers, making them a practical choice for growing families.
Can I personalise these labels with specific medical instructions?
Yes, you can personalise your labels with specific medical instructions or allergy warnings. Our custom pantry labels nz range includes options like the Allergy & Safety Label Pack B, which features larger stickers for detailed text. This allows you to include a name and a clear instruction, such as "No Dairy" or "EpiPen in Bag". Providing this level of detail ensures teachers and carers have the facts they need to keep your child safe.
Are the labels safe for items that go in the microwave?
These labels are suitable for use on standard microwave-safe containers used for school lunches and home storage. The UV DTF process creates a durable finish that handles the normal temperatures associated with reheating food. However, always ensure the container itself is microwave-safe before use. To maintain the integrity of the design over the long term, avoid placing the labels in direct contact with extreme heat sources or using them in conventional ovens or grills.
Do you offer local pickup for these labels in Auckland?
We certainly do. As a family-run business, we love offering a local pickup option for our community. This is a convenient way to get your labels quickly without waiting for national shipping. When you place your order online, simply select the pickup option at checkout. We will let you know as soon as your personalised items are ready for collection, so you can start organising your pantry and school gear right away.
