

DIY Personalised Gifts NZ: How to Create Premium Customised Gifts at Home
Have you ever spent hours crafting a thoughtful present only to watch the name label peel off after just one wash? It's frustrating when a heartfelt gesture looks tatty within days because of low-quality stickers or fiddly vinyl. Most of us want to create DIY personalised gifts NZ families will actually use and cherish, but achieving that high-end, "printed-on" look usually requires expensive machinery or professional services.
We understand that you want your bespoke creations to reflect the care you put into making them. You'll be pleased to know that you can achieve a professional, no-background finish right at home without the stress or the price tag. In this guide, you'll learn how to transform everyday items into premium gifts using modern UV DTF decals that offer incredible durability and a sleek, raised effect.
We'll show you exactly how to apply these transfers to everything from drink bottles to lunchboxes. You'll get practical tips on surface preparation and curing times to ensure your gifts survive the rigours of daily life. It's time to move beyond generic presents and start creating custom items that look like they came straight from a boutique shop.
Key Takeaways
- Learn how UV DTF decals create a professional "printed-on" look with a clean, no-background finish that standard stickers cannot match.
- Discover how to make high-quality DIY personalised gifts NZ families will cherish without needing to invest in expensive cutting machines.
- Get creative with bespoke gift ideas for drink bottles and teacher gifts that look like they came straight from a boutique shop.
- Master the simple application process, including the essential 72-hour cure time required to ensure your custom designs stay put during daily use.
- Support local by sourcing premium, Auckland-made transfers that are specifically designed for durability on hard surfaces.
The Rise of DIY Personalised Gifting in New Zealand
Something has shifted in the way Kiwis approach gift-giving. There's a growing preference for presents that feel considered and specific, rather than something grabbed off a shelf. A mug with someone's name on it, a drink bottle decorated with a child's favourite colours, a keyring that references an inside joke. These things carry weight that a generic gift simply can't match. The emotional value of making something yourself, or personalising something with care, is genuinely hard to replicate.
This trend connects to a broader movement around mass customization, where modern production methods have made it far more accessible for everyday people to create personalised items at home without needing professional equipment or design skills. For New Zealand families, that accessibility has opened up a whole new world of creative gifting.
Why DIY is the Perfect Choice for NZ Families
Cost is a real consideration, especially when you're making multiple gifts at once. Think about end-of-year teacher gifts, for example. Buying something meaningful for five or six teachers adds up quickly. Personalising items you already own, or sourcing affordable blanks and adding your own touch, is a genuinely practical solution. It also reduces waste. Instead of buying something disposable, you're transforming a durable item like a favourite drink bottle or lunchbox into something that'll actually get used every day.
That's exactly where DIY personalised gifts NZ families are gravitating toward: items that are functional, long-lasting, and personal all at once.
Moving Beyond Basic Stickers
Here's the frustration most people run into. You spend time on a gift, add a paper sticker or write a name in permanent marker, and within a week it's peeling, fading, or looking decidedly homemade in the wrong way. There's a real difference between a craft project and a professional keepsake, and that difference usually comes down to materials.
Traditional stickers simply weren't designed for high-use items. They bubble, lift at the edges, and can't handle the daily grind of lunchboxes being tossed into bags or drink bottles rattling around in the car. The NZ lifestyle is active. Gifts need to keep up.
Modern UV DTF transfer technology bridges that gap. It delivers a clean, no-background finish that looks like it was printed directly onto the surface, not stuck on top of it. The result feels polished and intentional. That's the shift happening right now: from basic craft supplies to materials that produce results worth keeping.
Choosing Your Materials: Why UV DTF Transfers are the Superior Choice
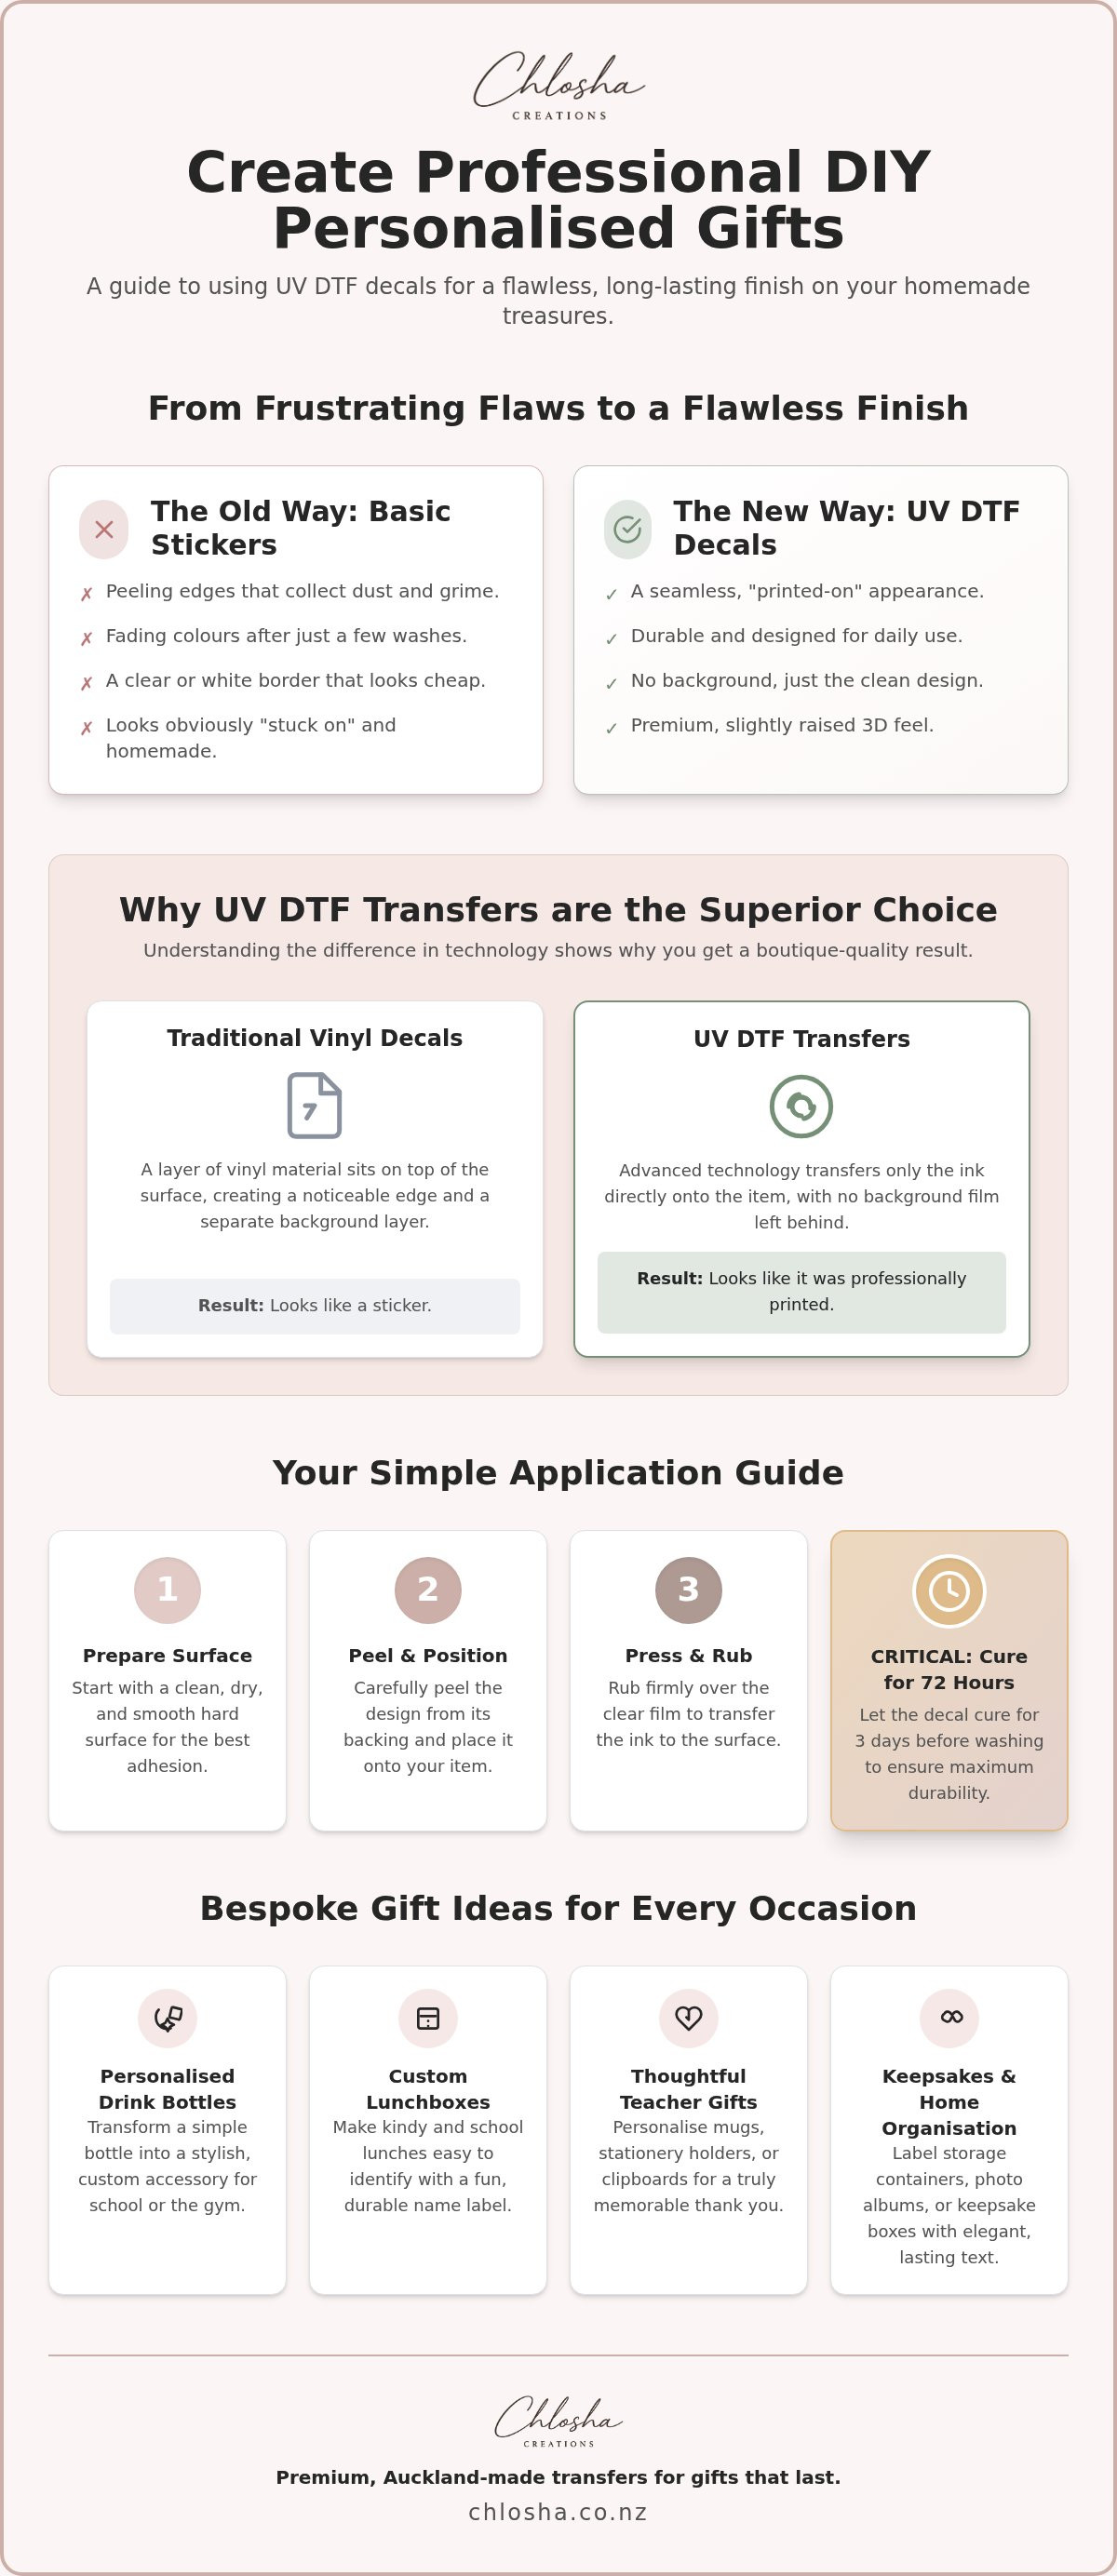
Creating professional results at home starts with choosing the right materials. While many people are familiar with traditional stickers, modern technology has introduced a more sophisticated option. UV DTF is a direct-to-film transfer that leaves only the ink on the surface. It’s a no-background, durable transfer technology for hard surfaces. This method provides a clean, smooth finish that looks like it was printed directly onto the item. When you’re making DIY personalised gifts NZ friends and family will love, this "printed-on" look makes all the difference.
The appeal goes beyond just the visual. These decals have a premium, slightly raised 3D feel that adds a tactile quality to your gifts. This raised effect catches the light and feels substantial under your fingers. Understanding the psychology of gift-giving helps us see why these small details matter; a gift that feels high-quality and carefully made strengthens the emotional bond between the giver and the receiver. It shows you’ve put thought into every aspect of the present.
UV DTF vs. Traditional Vinyl Decals
If you've used standard stickers before, you might have noticed a clear or white border around the design. Standard vinyl decals consist of a layer of material that sits on top of your item. Over time, the edges of these stickers can lift or collect dust, leading to the dreaded "peeling edge" problem. This is especially common on high-use items like drink bottles that are handled daily.
UV DTF transfers solve this by removing the background entirely. Because only the ink remains, there are no edges to catch or peel. This creates a seamless appearance that looks particularly stunning on glass or clear plastic. The application process is straightforward and doesn't require a heat press or cutting machine. You simply peel, press, and rub the design onto your surface. For those starting their journey with personalised name labels, the ease of use is a major benefit.
Best Surfaces for DIY Success
To get the best out of your decals, you need a compatible surface. Hard, smooth materials are the gold standard for these transfers. You'll find great success with:
- Glass: Perfect for jars, tumblers, and mirrors.
- Metal: Ideal for stainless steel flasks and tins.
- Hard Plastic: Great for lunchboxes and storage bins.
- Acrylic: Excellent for keyrings and signage.
It’s best to avoid silicone, fabric, or highly textured plastics, as the ink needs a firm, non-porous surface to bond effectively. Remember that while these transfers are incredibly durable, they require a 72-hour cure time before they should be exposed to moisture or heavy handling. This patience ensures your custom creations stay looking beautiful for a long time.
5 Creative DIY Personalised Gift Ideas for Every Occasion
Finding the right project is half the fun. When you're looking for DIY personalised gifts NZ families will actually use, think about items that get a workout every day. You don't need a massive budget to create something that feels premium; you just need a bit of creativity and the right materials. Here are five simple ways to get started.
- Bespoke Drink Bottles: Grab a high-quality stainless steel flask or a glass tumbler. Adding a clean name decal transforms a basic item into a gym-ready accessory or a sophisticated office companion.
- Customised Teacher Gifts: Teachers always need more organisation. A ceramic pen holder or a glass "Best Teacher" lolly jar becomes a cherished keepsake with a professional-looking transfer.
- Personalised Kindy Gear: Lunchboxes and snack containers are notorious for going missing in the cubby holes. Customising these items makes them easy to spot and hard to lose.
- DIY Home Organisation: Pantry jars with no-background labels look stunning on open shelving. These make wonderful housewarming gifts or a treat for your own kitchen.
- Event Favours: Planning a birthday party? Custom decals on goodie bags or little treasure tins make the celebration feel extra special for every guest.
Gifts for School and Kindy
Kids lose things. It's just a part of life. Using personalised name labels NZ parents trust can save a lot of money and stress over the school year. It makes your gear "lost-property-proof" while still looking stylish. For the little ones, try combining names with fun graphics. Our Icon + Name Packs are a great choice here. The icons help younger children recognise their own containers even before they've mastered reading their names. It's a simple way to build their independence.
Special Occasions and Keepsakes
Custom decals are a lifesaver for Father's Day or Mother's Day. You can create a one-of-a-kind coffee mug or a personalised tin for dad's shed tools. These small gestures carry a lot of weight. Keyrings and bag tags are another excellent option. They're thoughtful, small tokens that friends can carry everywhere. If you run a small business, DIY decal sheets are perfect for consistent branding on your gift packs. They give your packaging that boutique finish that customers really notice without needing to order thousands of units.
How to Apply Your Decals for a Professional Finish
Applying your transfers is the most rewarding part of the process. It's the moment your DIY personalised gifts NZ project turns from a plain object into a premium keepsake. While the application is simple, following a methodical approach ensures that clean, no-background finish we all love. You don't need fancy tools; a little patience and a steady hand are your best assets.
- Step 1: Surface Preparation. Clean your item thoroughly. Use rubbing alcohol or warm soapy water to remove oils, dust, or fingerprints. Ensure the surface is bone-dry before you begin.
- Step 2: Careful Positioning. Take your time to align the decal. Once the adhesive touches the surface, it bonds quickly. It's helpful to mark your centre point lightly if you're working on a large area.
- Step 3: The Squeegee Technique. Use a squeegee or a firm plastic card to rub the design. Start from the centre and work your way out to the edges. This pressure is what creates a strong, even bond across the entire design.
- Step 4: The Slow Peel. This is the critical part. Peel the carrier sheet back slowly at a very low angle, keeping it almost flat against the surface. If any part of the design lifts, stop immediately.
- Step 5: The Curing Phase. Your gift might look finished, but the bond is still setting. Give it time to rest. Patience here is the secret to a result that handles daily use.
Pro Tips for a Flawless Result
Working with curved surfaces like drink bottles can be tricky. A helpful trick is to use a hair dryer on a low, warm setting to gently soften the decal, making it more pliable as you wrap it around the curve. Always work from the centre outwards to avoid trapping air bubbles. Most importantly, wait at least 72 hours before exposing the item to moisture. This curing time allows the adhesive to reach its full strength before it faces the dishwasher.
Troubleshooting Common DIY Mishaps
If a small section of the ink doesn't lift from the carrier sheet, simply lay it back down and rub firmly with your squeegee again. Some plastics, like polypropylene, have low surface energy and can be more stubborn. In these cases, extra pressure and a slower peel are essential. Remember that durability depends on surface type and correct curing time. For the best start on your next project, explore our range of personalised name labels to find the perfect fit for your chosen surface.
Creating Customised Keepsakes with Chlosha Creations
At the heart of every great gift is a story. We're a family-run business based right here in Auckland, and we understand the joy that comes from creating something special for your loved ones. Chlosha Creations was born out of a desire for better organisation and more durable, beautiful ways to label the things we value. We don't just sell decals; we provide the professional-grade tools you need to bring your DIY personalised gifts NZ ideas to life with confidence.
Our commitment to quality is what sets us apart. We use premium UV DTF technology to ensure every transfer has that signature raised 3D effect and a clean, no-background finish. Whether you're a parent prepping for the school year or a small business owner looking for custom business logo transfers, we've got you covered. We've spent time perfecting our process so you can achieve a "printed-on" look that lasts, without needing to invest in your own machinery.
Exploring our range is easy. We offer everything from pre-cut decal packs for specific items to full DIY decal sheets for those larger projects. You can find everything from personalised name labels for the kids' lunchboxes to sophisticated branding decals for your corporate gifts. It's about giving you the flexibility to be as creative as you like.
Supporting Local NZ Craftsmanship
Choosing locally made transfers means you're supporting a business that understands the unique Kiwi lifestyle. Our designs are modern, clean, and built for the active lives we lead in New Zealand. From the playground to the office, our decals are designed to look great and stay put. If you're looking for inspiration, our Best Sellers collection is a fantastic place to see what other Kiwi DIYers are loving right now. It's a curated selection of our most popular designs, ready for your next project.
Ready to Start Your DIY Project?
Getting started is simple. Browse our collections to find the designs that speak to you. If you're new to the world of no-background decals, we recommend reading our UV DTF Transfers New Zealand guide for a deeper dive into how this technology works. We love seeing what our customers create. Once you've finished your project, feel free to share your creations with the Chlosha community. It's always inspiring to see how a simple decal can transform an everyday item into a treasured keepsake.
Ready to Create Your Own Custom Keepsakes?
Creating professional-quality gifts at home doesn't have to be complicated or expensive. By choosing premium UV DTF transfers, you can achieve a sleek, no-background finish that rivals any boutique shop. You've seen how easy it is to transform everyday drink bottles and lunchboxes into thoughtful presents that handle the daily grind. It's important to remember that the secret to a long-lasting bond lies in proper surface preparation and allowing that crucial 72-hour curing time before heavy use.
As a family-run business based in Auckland, we're proud to help you make DIY personalised gifts NZ families will cherish. Our locally made decals are designed for durability and style, ensuring your bespoke creations look beautiful for a long time. Whether you're prepping for the new school term or crafting a unique teacher gift, we're here to support your creative journey with high-quality materials delivered nationwide.
Are you ready to start your next project? Explore our range of DIY Decals and Name Labels at Chlosha Creations and discover how simple it is to add a professional, personal touch to your gifting. We can't wait to see what you create!
Frequently Asked Questions
Can I put my DIY personalised gifts in the dishwasher?
You can put items with our decals in the dishwasher, but you must wait at least 72 hours for the adhesive to cure completely. While the UV DTF ink is very durable, we always recommend hand washing where possible to keep your DIY personalised gifts NZ looking their best for longer. High-heat cycles and harsh detergents can eventually affect the bond, so treat your custom creations with a bit of extra care.
Will these decals work on silicone drink bottles or lunchboxes?
These transfers won't bond effectively to silicone drink bottles or lunchboxes. Silicone is a low-energy surface that naturally resists adhesives, meaning the decal will likely peel off almost immediately. For the best results, stick to hard, smooth surfaces like glass, metal, acrylic, or hard plastics. If you're unsure about a specific material, try a small test piece first or choose a stainless steel flask instead for your project.
How long do UV DTF transfers last on everyday items?
The lifespan of a UV DTF transfer depends on the surface type, how well it was applied, and how the item is handled. On a well-prepared hard surface with a full 72-hour cure time, these decals can last for years of regular use. Because the ink is cured with UV light during production, it's resistant to fading and light scratches. However, avoid picking at the edges or using abrasive scrubbers during cleaning.
Do I need a heat press or special tools to apply these decals?
You don't need a heat press, cutting machine, or any expensive machinery to apply these transfers. They're designed for easy peel and stick application at home using just your hands and a firm rubbing tool. A squeegee is ideal, but a plastic bank card works just as well to ensure a firm bond. This makes them the perfect choice for anyone wanting to create professional-quality bespoke gifts without a dedicated craft room.
Are UV DTF transfers better than traditional vinyl stickers?
UV DTF transfers offer a distinct no-background finish that traditional vinyl stickers can't match. Instead of a thick layer of plastic with a visible border, only the ink remains on your item, creating a seamless, printed-on appearance. They also feature a slightly raised 3D texture that feels more premium. While vinyl is great for many projects, UV DTF is often preferred for gifts because it looks more like a professional boutique product.
What happens if I make a mistake during the application?
If you make a mistake during the initial positioning, you might be able to lift the decal gently if it hasn't been pressed down yet. However, once you've applied pressure with a squeegee, the bond is very strong and removing it may damage the design. If a small part of the ink stays on the carrier sheet during the peel, simply lay it back down and rub firmly again before continuing the peel very slowly.
Can I use these decals for my small business products in NZ?
Absolutely, many New Zealand makers use our custom UV DTF printing for their own product ranges. They're an excellent way to add your business logo to jars, tins, or packaging without the high cost of large-scale commercial printing. Since there's no background, your branding looks integrated into the product rather than like a stuck-on label. It's a cost-effective way to elevate your small business presentation and create a high-end boutique feel.
How do I choose the right size label for my gift project?
Choosing the right size starts with measuring the flat or curved area of your gift item. Use a flexible measuring tape to find the maximum width and height available for your DIY personalised gifts NZ. It's usually best to leave a small margin around the edges so the decal doesn't sit too close to rims or corners. If you're personalising a drink bottle, consider how the design will wrap around the curve of the bottle.
