

Kindy Name Labels: A Practical Guide for Australian Families
The most useful kindy name labels are the ones that suit the belongings your child actually takes to kindy. Bottles, lunchboxes and stationery can look very similar during a busy day, so a clear name can help children and adults identify each item.
Start by checking the item’s surface. A label designed for a smooth, hard drink bottle may not suit clothing, soft plastic or textured belongings. Careful application and aftercare also matter if you want the label to stay looking its best through everyday use.
This guide explains how to choose kindy name labels for compatible belongings, decide between a name-only or icon-and-name design, and apply and care for UV DTF labels. You’ll find practical tips for choosing a suitable surface, preparing an item and hand washing labelled drink bottles and lunchboxes.
Key Takeaways
- List the belongings your child takes to kindy, then choose labels to suit the flat space on each item.
- Use kindy name labels on suitable smooth, hard surfaces, not flexible, soft, textured or grooved materials.
- Choose a name-only or icon-and-name design based on what will be clear and easy for your child to recognise.
- Apply labels to a clean, dry surface, follow the care guidance and hand wash labelled drink bottles and lunchboxes.
- Chlosha’s UV DTF name labels have a clean, no-background finish for compatible hard-surface belongings.
Why kindy name labels help identify everyday belongings
Kindy name labels identify a child’s belongings, helping show which items belong to them. A name on a drink bottle or lunchbox makes it easier to distinguish among similar-looking items during busy routines. In simple terms, the concept of a label and its various applications includes using a visible mark to identify an item.
Labels are especially useful on belongings that travel between home and kindy, are handled often or are put alongside other children’s things. Start with the items your child regularly takes instead of trying to label everything. A visible name can help your child, whānau and kindy team recognise an item, although it can’t prevent belongings from being misplaced.
Which kindy belongings are useful to label?
Think about your child’s regular routine. Do they take a drink bottle and lunchbox each day? Do they use their own stationery, sports gear or storage container? These can be practical choices if they have a compatible smooth, hard surface. Look for a place where the label will be easy to see and won’t get in the way.
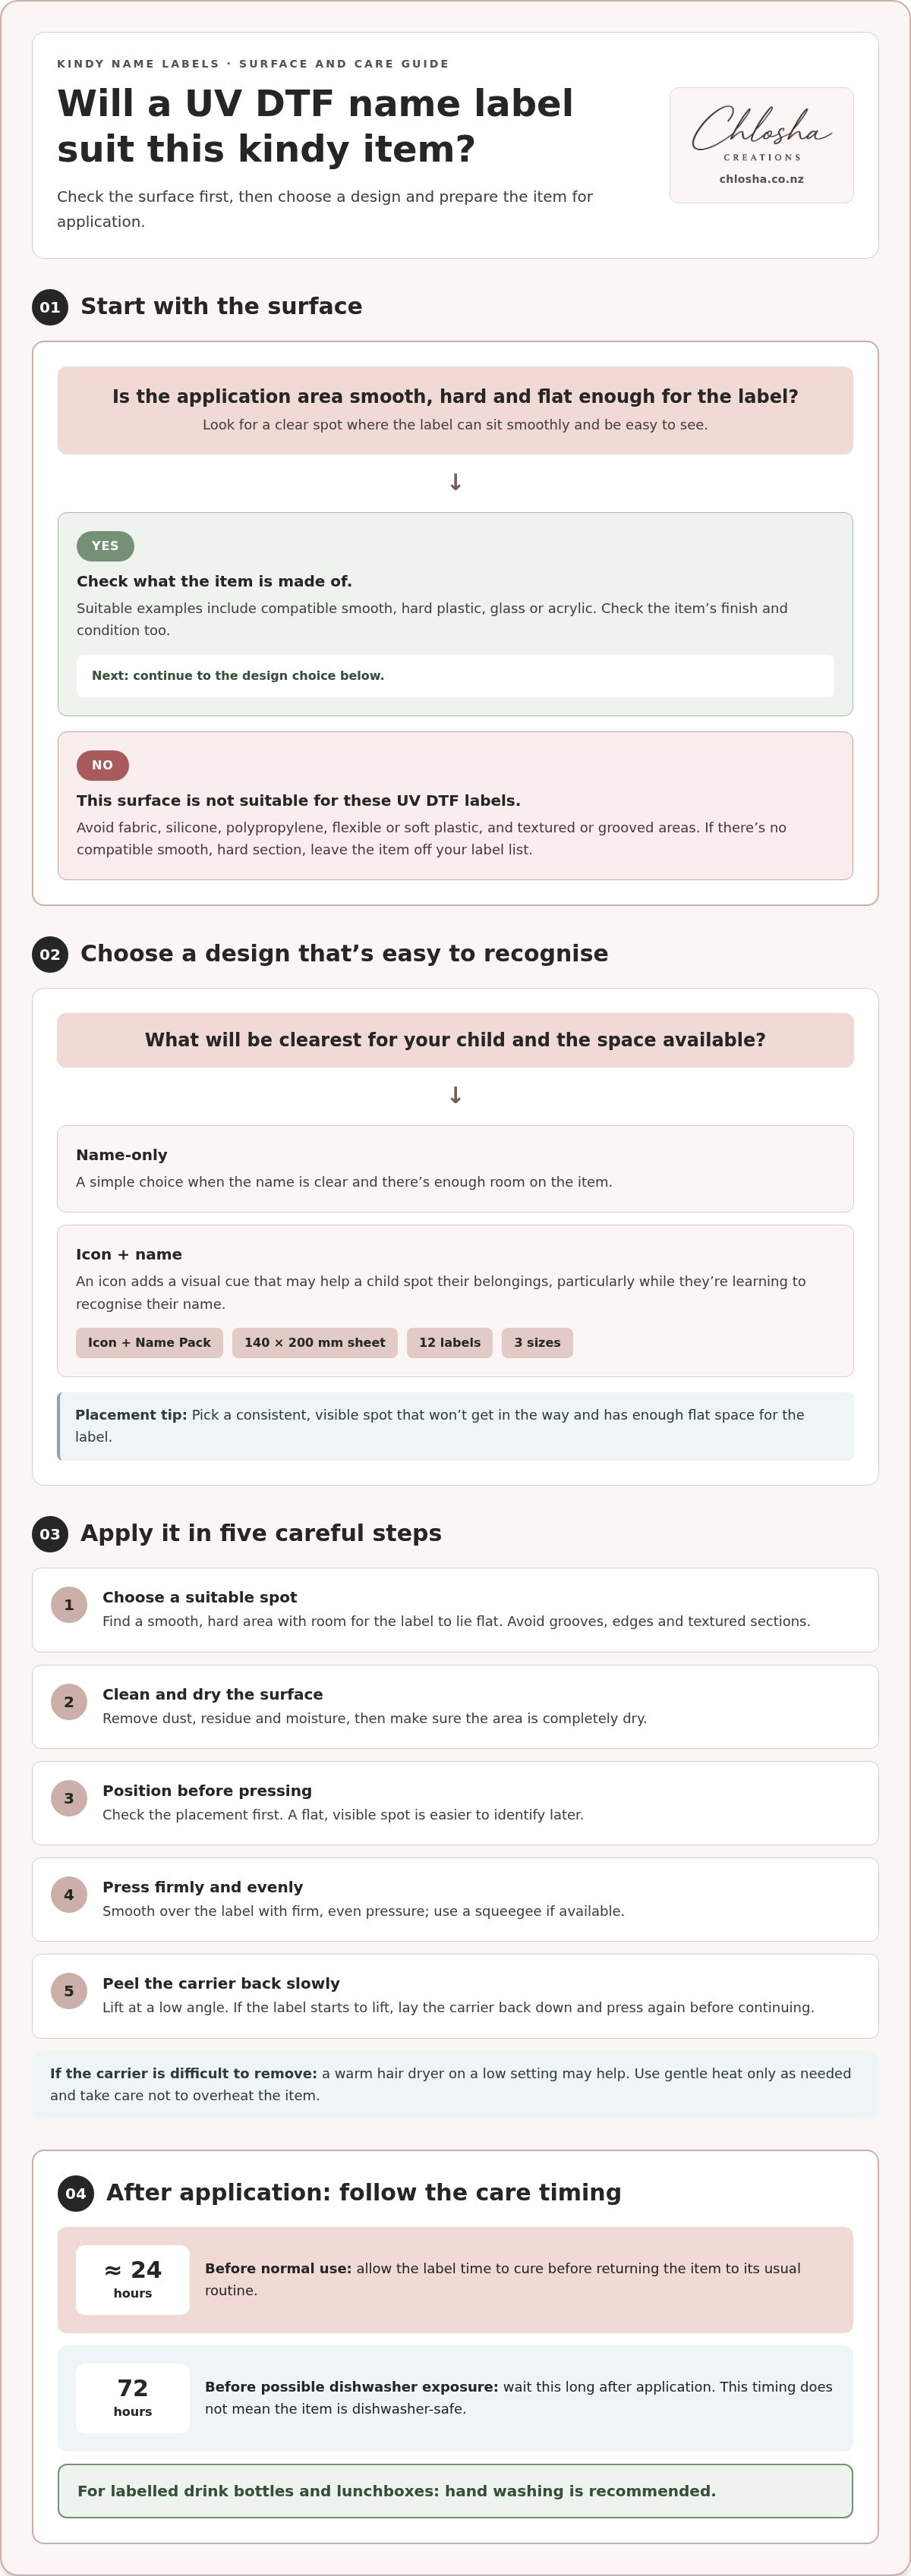
Check the surface as well as the item. UV DTF name labels are intended for suitable smooth, hard surfaces, such as compatible bottles, lunchboxes, hard plastic, glass and acrylic. They won’t suit every belonging: fabric, silicone, flexible or soft plastic, and textured or grooved areas are unsuitable.
What can a name label help with?
A name gives children and adults a clear visual cue when belongings look alike. If your child is still learning to recognise their things, putting the label in a consistent, visible place may make it easier to find the right bottle or lunchbox. Choose a spot that can be seen during everyday use and has a compatible surface.
For a practical starting point, browse the personalised name labels collection, then match a label to the item and surface you want to identify.
Keep your choices focused with a quick routine check: list the belongings your child takes to kindy, note which have suitable hard surfaces, and prioritise the items that are easiest to mix up. This helps you choose labels for everyday needs rather than adding a name to every item.
How to choose kindy name labels for different surfaces and routines
Check the item’s surface first, then consider how your child uses it. UV DTF name labels are designed for suitable smooth, hard surfaces. They won’t suit every kindy belonging, and the surface’s texture, shape and condition can affect how well a label applies.
Match the label to the item surface
| Kindy item | Surface to look for | Label consideration |
|---|---|---|
| Drink bottle or lunchbox | Smooth, hard plastic, glass or acrylic | Choose a clear, flat area with enough room for the label to sit smoothly. |
| Hard-surface stationery | Only a smooth, hard section | Check the available space and avoid ridges or grooves. |
| Sports gear or storage item | A compatible smooth, hard surface | Check the item’s finish and condition before choosing a spot. |
| Fabric, silicone or flexible item | Soft or flexible material | Not suitable for these UV DTF labels. |
Avoid fabric, silicone, polypropylene, flexible or soft plastic, and textured or grooved areas. If a bottle or container has different finishes, don’t assume the label will suit every part. Look for a smooth, hard section, and leave items without a compatible surface off your label list.
Choose a name-only or icon-and-name design
A name-only design keeps identification simple. An icon alongside the name adds a visual cue that may help a child spot their belongings, particularly while they’re learning to recognise their name. Choose a design that your child can recognise and that remains clear in the space available.
The Icon + Name Pack comes on a 140 × 200 mm sheet with 12 labels in three sizes. The different sizes can suit different spaces on compatible items. Browse Personalised Icon + Name Label Packs to explore this option.
Before choosing, compare the items your child uses with the available surface and the space each label needs. For a straightforward starting point, browse kindy and kids name labels and consider which style best fits your family’s routine.
How to apply kindy name labels and care for labelled items
Choose the right spot before applying a label. The surface needs to be clean, dry, smooth and hard. Dust, moisture, oils, grooves and texture can affect how the label sits, so prepare the item carefully before you apply kindy name labels.
Apply a UV DTF name label step by step
- Choose a suitable spot. Find a smooth, hard area with enough room for the label to lie flat. Avoid grooves, edges and textured sections.
- Clean and dry the surface. Remove dust, residue and moisture, then make sure the area is completely dry.
- Position the label. Check the placement before pressing it down. A flat, visible spot is easier to identify later.
- Press firmly. Smooth over the label with firm, even pressure, using a squeegee if available.
- Peel back the carrier. Lift it slowly at a low angle. If the label starts to lift, lay the carrier back down and press again before continuing.
If the carrier is difficult to remove, a warm hair dryer on a low setting may help. Use gentle heat only as needed and take care not to overheat the item.
Care for labelled bottles and lunchboxes
Allow the label time to cure before returning the item to its usual routine. Wait approximately 24 hours before normal use. If an item may be exposed to a dishwasher, wait 72 hours after application before that exposure. This timing does not mean the item is dishwasher-safe. Hand washing is recommended for labelled drink bottles and lunchboxes. Do not microwave labelled items.
Durability can depend on the surface, how carefully the label is applied, curing time, washing conditions and ongoing use. A compatible surface and gentle hand washing can help you care for a labelled item, but labels can still experience wear.
Good preparation and gentle care help keep a label neatly in place through everyday use.
Plan a kindy label pack around belongings, names and placement
Counting the items your child actually takes to kindy can help you choose a useful label pack. Focus on belongings that need identifying rather than treating this as a general kindy-supplies checklist. A few notes about each item’s surface and routine will help you plan where a label could go.
Make a short list before choosing a pack
Group items by how they’re used. For example, note the food containers and drink bottle your child takes regularly, then add any hard-surface stationery or other belongings that travel between home and kindy. Check that each item has a suitable smooth, hard area, and consider how much flat space is available before choosing label sizes.
The Classic Name Pack comes on a 140 × 200 mm sheet with 12 labels in three sizes. The range of sizes can help you match labels to different amounts of space on compatible belongings. Compare the label sizes with the available area before applying one. Leave items off your list if their surface is unsuitable, such as fabric, silicone, flexible plastic, or a textured or grooved section.
- Food containers: Note which ones travel regularly and where a clear, flat label could sit.
- Drink bottles: Look for a smooth, hard area that’s visible during everyday use.
- Stationery or other items: Include only those with a compatible surface and enough room for a label.
Keep names and placement easy to recognise
Choose a name style that’s clear on the item and easy to recognise at a glance. Consider the space available: a smaller area may suit a smaller label, while a broader, flat section gives the name more room. Place the label where it can be seen during normal handling, not on the base or in a tucked-away spot.
An icon paired with a name adds a visual cue. This may be helpful if your child recognises a familiar image quickly or if several belongings look alike. Keep the name legible and choose a spot where both the icon and name can be seen. Browse personalised icon and name label packs to explore this format.
Once you’ve matched your list to suitable surfaces and available label sizes, you’ll have a clearer idea of what your family needs. Explore personalised name labels to find an option for your child’s kindy belongings.
Find kindy name labels for your family’s everyday items
Choosing kindy name labels follows a simple process: identify the belongings you want to mark, check that each has a suitable surface, choose a name-only or icon-and-name design, then apply the label carefully. This keeps your choice focused on the items your child uses instead of assuming one label type suits everything.
When personalised UV DTF labels may suit
Chlosha’s personalised UV DTF labels are designed for compatible smooth, hard belongings, such as suitable drink bottles and lunchboxes. They have a clean, smooth finish with no background and a slightly raised effect. Name-only labels provide straightforward identification, while an icon paired with a name adds a visual cue.
These labels aren’t intended for fabric, silicone, polypropylene, flexible or soft plastic, or textured and grooved surfaces. Hard items can also vary in finish and condition, so choose a smooth, flat application area. Durability depends on the surface, correct application, curing time, washing conditions and ongoing use. Hand washing is recommended for labelled bottles and lunchboxes.
Choose a practical next step
Before selecting a pack, compare its label sizes with the flat areas available on the belongings you’ve listed. The Classic Name Pack and Icon + Name Pack each come on a 140 × 200 mm sheet with 12 labels in three sizes. Comparing the dimensions with your items can help you plan placement and avoid choosing a label that won’t fit.
Once you’ve identified suitable items and decided whether a name-only or icon-and-name format fits your needs, explore the name labels collection. A considered choice and careful application make it easier to add clear identification to everyday belongings with a compatible surface.
Make kindy belongings easier to recognise
A little planning can make choosing kindy name labels straightforward. Start with the belongings your child takes regularly, check that each surface is smooth and hard, then choose a name-only or icon-and-name design to fit the available space. Careful application and hand washing are practical parts of caring for labelled bottles and lunchboxes.
Chlosha’s personalised UV DTF name labels have a clean, smooth, no-background finish for compatible hard surfaces. The Classic Name Pack and Icon + Name Pack each include 12 labels on a 140 × 200 mm sheet, with three label sizes to consider when planning placement.
Ready to find an option for your child’s suitable everyday items? Explore personalised kindy and kids name labels, and compare the label sizes with each item before applying. Chlosha Creations makes UV DTF name labels for compatible smooth, hard belongings.
Frequently Asked Questions
What are kindy name labels used for?
Kindy name labels identify a child’s belongings, making items easier to recognise among similar drink bottles, lunchboxes or stationery. They’re most useful on belongings that travel between home and kindy or are handled regularly. A visible name can help children and adults identify an item, but it can’t prevent belongings from being misplaced. Choose a label only for an item with a suitable surface.
Which kindy belongings can I put name labels on?
UV DTF name labels can be used on compatible smooth, hard surfaces, such as suitable drink bottles, lunchboxes, hard plastic, glass and acrylic. Some hard-surface stationery, sports gear or storage items may also suit if they have a smooth, flat area. Check the specific surface before choosing a label. Textured, grooved, silicone, flexible or soft plastic, fabric and polypropylene surfaces aren’t suitable.
Are UV DTF kindy name labels suitable for drink bottles?
They can suit a drink bottle if it has a compatible smooth, hard surface, such as suitable hard plastic, glass or acrylic. Check the bottle’s finish and find a flat area for application. Avoid textured or grooved sections and polypropylene. Apply the label carefully, allow it to cure, and hand wash the bottle. Suitability and durability depend on the surface, application, curing time, washing conditions and ongoing use.
How do I apply a kindy name label?
Start with a clean, dry, smooth and hard surface. Position the label, then press or squeegee it firmly and evenly. Peel the carrier away slowly at a low angle. If needed, use a warm hair dryer on a low setting. Allow approximately 24 hours before normal use. Careful preparation helps the label sit neatly, while an unsuitable or dirty surface can affect the result.
Can I put kindy name labels in the dishwasher?
Hand washing is recommended for labelled drink bottles and lunchboxes. Dishwasher exposure isn’t guaranteed to be suitable, as durability can depend on the item’s surface, application, curing time, washing conditions and ongoing use. If considering dishwasher exposure, wait approximately 72 hours after application. This waiting period does not make an item dishwasher-safe or guarantee how the label will hold up. Do not microwave labelled items.
Are kindy name labels suitable for clothing or silicone items?
No. UV DTF name labels are designed for suitable smooth, hard surfaces, not clothing or silicone. They also aren’t intended for fabric, textured or grooved areas, flexible or soft plastic, or polypropylene. For clothing or silicone belongings, use an identification method suited to that material. Match the label to the item’s actual surface rather than assuming one label type will work across all kindy belongings.
