

Personalised Bike Helmet Decals & Sports Gear Stickers: The Ultimate 2026 Guide
With more families than ever enjoying outdoor activities and hitting the paths, the chances of your child's gear getting mixed up at the park or the local sports hub have never been higher. It's frustrating when generic stickers peel off after a single rainy Saturday match, leaving you with a sticky mess and a lost property headache. That's why high-quality personalised bike helmet decals have become a must-have for keeping track of expensive sports kit without compromising on style.
We understand you want a solution that looks like it was printed directly onto the equipment rather than something that feels like a tacky DIY project. You've likely dealt with labels that lift at the corners or fade after a few weeks of use. This guide will show you how to choose and apply the most durable, professional-looking decals to keep your family’s sports gear organised and out of the lost property bin. We'll explore the latest UV DTF technology for a smooth, slightly raised, no-background finish. We also provide a step-by-step plan for labelling everything from cricket bats to hockey sticks so they stand up to the elements.
Key Takeaways
- Learn why UV DTF technology provides a seamless, printed-on look that outperforms traditional stickers on high-impact sports equipment.
- Discover how to correctly apply personalised bike helmet decals so they stay secure through rain, mud, and heavy weekend use.
- Get practical tips for labelling curved surfaces and high-grip items like cricket bats or hockey sticks without affecting your performance.
- Master the squeegee method and essential surface preparation to ensure your labels survive the entire sports season.
- Save money on replacement gear by keeping your family's kit organised and easy to spot in crowded team changing rooms.
Why Ordinary Stickers Fail on High-Impact Sports Gear
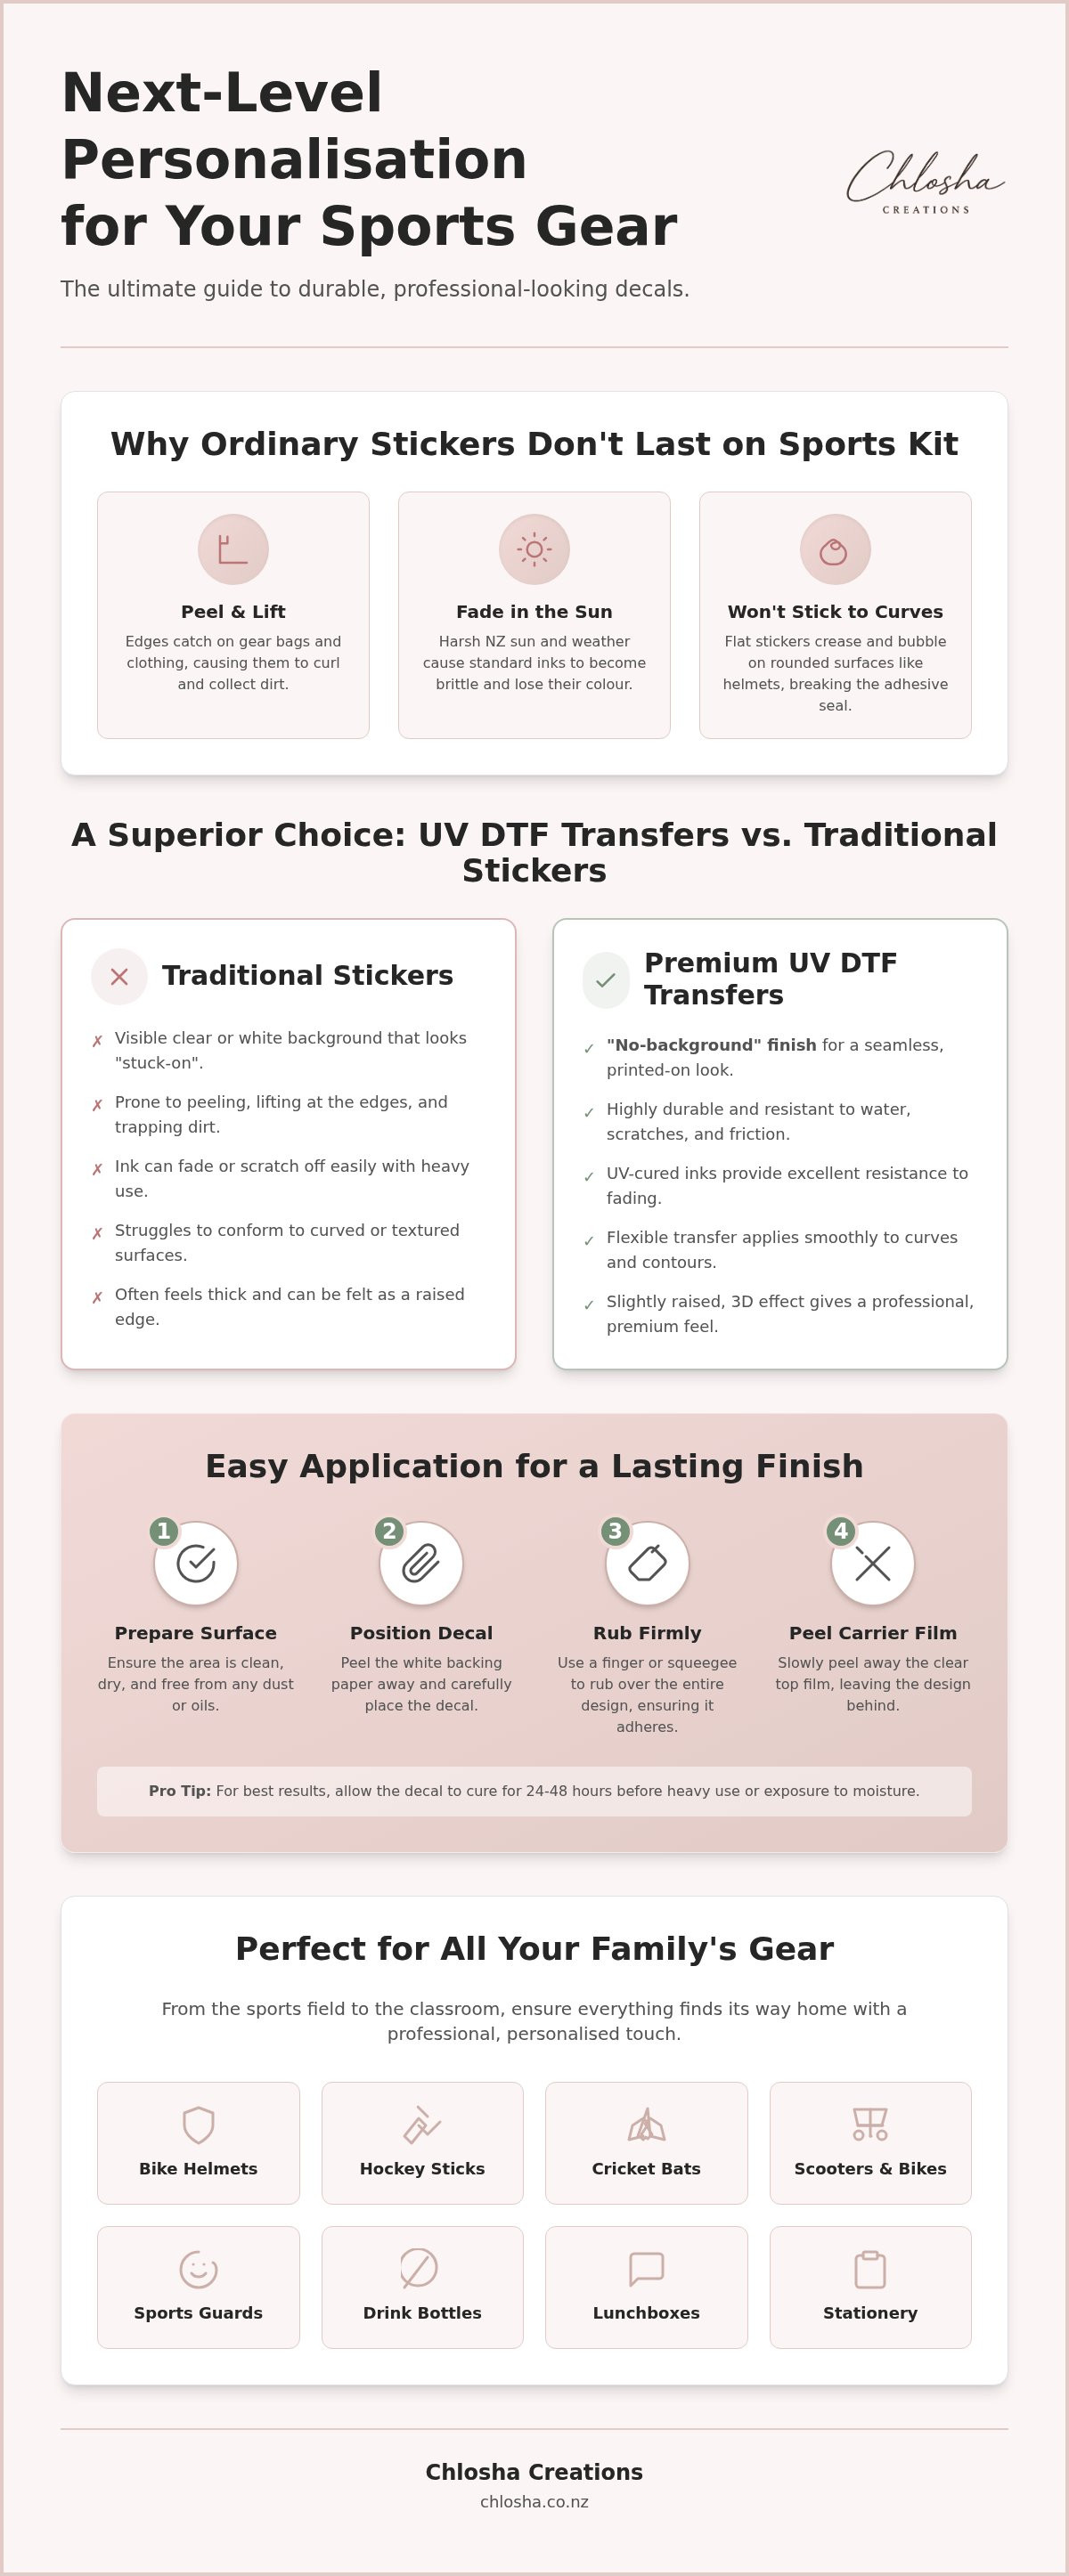
Standard paper or vinyl stickers often struggle in the rough-and-tumble world of Kiwi sports. Whether it's a muddy Saturday morning at the rugby fields or a humid afternoon at the velodrome, sports gear faces extreme conditions. Sweat, rain, and dirt quickly get under the edges of cheap adhesive labels. Once that happens, the sticker starts to curl, collect lint, and eventually falls off. This is a common issue for families looking for personalised bike helmet decals that actually last the distance.
Helmets present a unique challenge because of their compound curves. Most stickers are cut from flat sheets of material. When you try to wrap a flat piece of vinyl around a rounded bike helmet, it naturally wants to crease or lift at the edges. Professional athletes and serious hobbyists usually prefer a "factory" look; they want their name to appear as if it was part of the original design, not an afterthought. Understanding what decals are and how they differ from standard stickers is the first step in choosing gear that won't let you down.
The Limitations of Traditional Vinyl
Traditional vinyl stickers often have a visible border or a clear square background. On high-end carbon fibre or matte-finish gear, these borders can look untidy and "stuck on." Beyond the looks, these borders are a physical weak point. Every time a helmet is tossed into a gear bag or a bat is pulled from a kit, friction rubs against those edges. Over time, the friction causes "edge-lift," leading to a messy, peeling label. Many modern sports guards are made from low-surface-energy plastics. These materials are notoriously difficult for standard adhesives to grip, which is why you see so many "lost property" bins overflowing with unlabelled items.
The Cost of Losing Unlabelled Kit
Losing a premium cricket bat or a high-spec helmet isn't just annoying; it's expensive. In the chaos of a team changing room or during travel for away games, accidental swaps happen constantly. When gear looks identical, it's easy for someone to grab the wrong kit by mistake. Investing in durable personalised bike helmet decals helps prevent these mix-ups. By clearly marking your gear with a professional finish, you ensure it stays out of the lost property bin and in your bag. For more tips on keeping things organised, check out The Ultimate Guide to Personalised Name Labels in NZ. It's a small step that saves a lot of stress and money in the long run.
The UV DTF Advantage: Why "No-Background" Decals are a Game-Changer
UV DTF stands for Ultraviolet Direct-to-Film. It's a modern printing method that creates a transfer rather than a traditional sticker. During the process, ink is printed onto a film and cured instantly with UV light. A varnish layer is added to give the design a slightly raised, 3D effect. When you apply these to a helmet or bat, you aren't just sticking on a piece of plastic. You're transferring the ink itself. This results in a "no-background" finish. Only your chosen name and icon remain on the surface, giving your gear a sleek, professional appearance.
Traditional stickers often look like a DIY project because of the visible clear or white border around the text. With personalised bike helmet decals made from UV DTF, that border is gone. It integrates seamlessly with the equipment. It looks professional; it looks like it came from the factory that way. This is why athletes and parents prefer them for high-value gear. The finish is smooth to the touch and lacks the bulky edges that usually catch on clothing or gear bags.
UV DTF vs. Traditional Stickers
If you've ever used vinyl stickers, you know they can feel thick. They have a physical edge that you can catch with your fingernail. UV DTF transfers are different. They are incredibly thin but tough. They offer a "printed-on" look that vinyl simply can't match. This makes them ideal for sleek items like drink bottles, scooters, and bikes where you want the branding to look integrated. For a deeper dive into the science behind this, you can read UV DTF Transfers New Zealand: The Complete Guide.
Superior UV and Weather Resistance
Our New Zealand sun is notoriously harsh. Standard stickers often fade or become brittle after a few months of outdoor use. UV DTF technology is specifically designed to handle these conditions. The UV-cured inks are highly resistant to fading, even during a long summer of cricket or tennis. Safety is just as vital as style. Research from the Bicycle Helmet Safety Institute explains how adhesives can damage helmet shells if they contain certain solvents. Because UV DTF transfers are fully cured before they ever touch your gear, they provide a safer way to customise without compromising the integrity of the plastic shell.
Durability always depends on the surface type and correct application. When applied to a clean, smooth, hard surface and allowed to cure, these transfers are remarkably hardy. They don't have the bulk of traditional labels, so there's less material to get caught or knocked. If you're ready to upgrade your gear, take a look at our range of personalised name labels to find a style that fits your team.
Matching Decals to Your Specific Sports Equipment
Every piece of sports equipment has its own set of challenges. Applying a label to a flat cricket bat is a very different task than trying to wrap a sticker around the complex curves of a helmet. Because our transfers are "no-background," they are much more forgiving on these tricky surfaces. You aren't fighting against a stiff piece of plastic that wants to crease. Instead, you're applying a flexible ink transfer that follows the contours of your gear. This ensures your personalised bike helmet decals look like a professional part of the kit rather than a last-minute addition.
Safety remains the priority for any athlete. When you're customising safety gear, you must ensure you aren't compromising its integrity. Following official helmet safety standards means avoiding harsh chemical adhesives that could weaken the protective shell. Our transfers are fully cured before application, providing a safer way to add identification. Whether it's a scooter, a bike frame, or an iPad used for coaching analysis, the goal is a clean finish that stays put through sweat, rain, and heavy use.
Labelling High-Value Gear
Cricket bats and hockey sticks are significant investments for any family. To get the most life out of your Personalised Sports & Gear Labels, think about placement. For cricket bats, the shoulder or the back of the blade is ideal. Avoid the "sweet spot" where the ball makes the most impact. On hockey or lacrosse sticks, the upper shaft is the best location. This keeps the label away from the constant friction of the turf and mud, ensuring the name remains legible all season long. It also prevents the decal from interfering with your grip during a match.
Bike Helmets, Bikes, and Scooters
Adding personality to a child's gear is easy with Icon + Name Packs. These allow you to pair a name with a fun symbol, making it even easier for younger kids to recognise their own stuff. When ordering personalised bike helmet decals, keep colour contrast in mind. If you have a dark-coloured helmet, a bright white or silver decal will be much easier to spot than a dark green one. High-contrast colours aren't just for style; they make the gear stand out in a crowded school bike rack or at a busy weekend event. This simple choice helps ensure that high-value kit actually makes it back home after the game.
How to Apply and Care for Your Personalised Decals
Applying your new personalised bike helmet decals correctly is the secret to a professional finish. Even the best UV DTF transfer won't stick if the surface isn't ready. You need a clean, dry, and smooth area to start with. Any oily residues, dust, or silicone-based cleaners will prevent the adhesive from bonding properly. It's best to use a lint-free cloth and a bit of rubbing alcohol to prep the spot. Once it's bone dry, you're ready to go.
Getting the transfer onto the gear requires a bit of pressure. We call this the squeegee method. You don't need fancy tools; a credit card or even your thumb works well. Press firmly across the entire design to ensure every part of the ink transfer makes contact with the surface. This step is vital for longevity, especially on equipment that sees a lot of action.
Step-by-Step Application Guide
Start by positioning your decal exactly where you want it. Once it touches the surface, the adhesive starts to work. After you've pressed it down firmly, it's time for the "low angle" peel. Slowly pull the carrier sheet back against itself, keeping it as flat as possible. If you see any part of the design lifting, stop immediately. Rub that section down again and try peeling from a different corner. For tricky curved surfaces like bike helmets, a warm hair dryer on a low setting can help. The gentle heat softens the transfer slightly, allowing it to mould to the shape without creasing.
Curing and Long-Term Maintenance
Patience is your best friend when it comes to sports gear. While the decal might feel stuck immediately, the bond needs time to reach full strength. Wait at least 24 hours before taking the gear out for normal use. If you're planning on heavy washing or if the gear is going to be exposed to a lot of mud and rain, give it a full 72 hours to cure. This waiting period ensures the "printed-on" look stays intact for the long haul.
For cleaning, be gentle. Avoid abrasive cleaners or harsh scrubbing directly over the decal. A soft cloth and mild soapy water are usually all you need to keep things looking fresh. If you're looking to organise more than just your sports kit, these transfers are also great for other outdoor adventures. You can learn more about keeping your equipment sorted in our guide to Waterproof Labels for Camping Gear. Ready to get started? Browse our full collection of personalised name labels to find the perfect fit for your family.
Organise Your Team with Chlosha Creations’ Premium Labels
Keeping track of a whole team's gear shouldn't be a full-time job. As an Auckland-based family business, Chlosha Creations was born from a desire to make daily life a little more organised and a lot more stylish. We understand the chaos of Saturday morning sports. We've seen the overflowing lost property bins at local clubs. That's why we're committed to providing a practical, high-quality solution for Kiwi and Australian families. Whether you're looking for personalised bike helmet decals for the school commute or durable branding for a local hockey club, our focus is always on longevity and a premium finish.
Customisation is at the heart of what we do. You aren't limited to a one-size-fits-all design. You can choose fonts and icons that truly match your team’s vibe or your child’s personality. From sleek and professional to fun and bold, our labels help gear stand out for all the right reasons. Because we handle production locally in Auckland, we maintain strict quality control over every transfer that leaves our workshop. We offer convenient local pickup for our Auckland customers and fast national shipping to ensure your gear is ready before the next big game.
The Chlosha Difference
What sets our labels apart is the modern, "no-background" aesthetic. Traditional stickers often have a visible border that collects dirt and eventually peels. Our UV DTF transfers eliminate this problem entirely. The result is a clean, printed-on look that integrates perfectly with high-end sports equipment. You'll also notice a slightly raised 3D effect. This adds a tactile, premium feel that you simply don't get with flat vinyl. It's a small detail that makes a big difference in how your equipment looks and feels. If you're curious about our most popular designs, you can browse our Best Sellers Collection to see what other families are choosing.
Supporting Local NZ Craftsmanship
When you choose Chlosha Creations, you're supporting local NZ craftsmanship. We take pride in our work and in helping our community stay organised. Local production means we can be meticulous with our production methods, ensuring every personalised bike helmet decals set meets our high standards. We want to help you stay stress-free on game day. No more accidental gear swaps or expensive replacement costs for lost kit. Just durable, beautiful labels that do exactly what they're supposed to do. Ready to get your kit sorted? Explore the Sports & Gear Name Label Packs and find the perfect fit for your team.
Ready to Gear Up for the Season?
Choosing the right way to label your family's sports kit shouldn't be a headache. We've seen how standard stickers often fail on curved surfaces; however, with modern UV DTF technology, those worries are a thing of the past. These transfers provide a premium "no-background" finish that looks like it was printed directly onto your equipment. Whether you are applying personalised bike helmet decals or marking a high-value cricket bat, the result is a clean, professional look that stands up to the elements.
Our labels are locally made in Auckland and designed specifically for durable outdoor sports use. By following the simple application and curing steps we've discussed, you can ensure your gear stays organised and easy to identify in a crowded changing room. It's a simple, practical way to protect your investment and keep your Saturdays stress-free. If you're ready to give your equipment a professional upgrade, you can Shop the Personalised Sports Gear Collection today. We can't wait to help you get your team sorted for their next big adventure!
Frequently Asked Questions
Are these sports gear stickers actually waterproof?
Our UV DTF transfers are highly water-resistant once they have fully bonded to a suitable hard surface. While we don't use the term permanently waterproof, they are designed to handle rain, mud, and regular cleaning without lifting. It's essential to wait at least 72 hours before exposing the labels to heavy moisture. This ensures the adhesive has reached its maximum strength on your gear, making them perfect for outdoor sports.
Will the labels stay on my child’s bike helmet or cricket bat?
These labels are specifically designed for smooth, hard surfaces like helmets and bats. For personalised bike helmet decals to stay secure, the surface must be free from textures, grooves, or silicone coatings. When applied to clean plastic or finished wood, the no-background transfer integrates with the item. This prevents the edges from catching on gear bags or during play, which is the most common reason standard stickers fail during the season.
Can I put drink bottles with these labels in the dishwasher?
You can put drink bottles with our UV DTF labels in the dishwasher, provided you wait 72 hours after application. This curing time is non-negotiable for labels that will face heat and water pressure. We recommend placing items on the top rack and avoiding industrial-strength cycles. While the transfers are very durable, longevity depends on the surface material and following these care steps to protect the slightly raised, 3D finish of the design.
How do I apply decals to curved surfaces like a bike helmet?
Applying decals to curved surfaces requires a bit of care and the right technique. Start by cleaning the area with rubbing alcohol to remove any oils. Position the transfer and use a firm squeegee motion with your thumb or a card to press it down. If you encounter stubborn curves, a hair dryer on a low setting can gently soften the transfer. This allows it to mould to the shape without creasing or creating air bubbles.
Do these stickers leave a sticky residue if I need to remove them?
Most UV DTF transfers can be removed with a bit of effort, and they generally don't leave a heavy, permanent residue on hard surfaces. If you find a small amount of adhesive left behind, a gentle wipe with warm soapy water or a mild adhesive remover usually clears it up. Always test a small, hidden area first to ensure the cleaner doesn't affect the helmet's finish or the structural integrity of your sports equipment.
What is the difference between UV DTF and regular vinyl stickers?
The main difference is the no-background finish and the tactile feel. Regular vinyl stickers are printed on a sheet of plastic with a visible border. UV DTF transfers use a direct-to-film process where only the ink and a varnish layer are transferred. This creates a slightly raised, 3D effect that looks printed directly onto the item. It’s a much cleaner, more modern look for personalised bike helmet decals compared to traditional bulky stickers.
Can I include a sports icon next to my child’s name?
Absolutely, we offer specific Icon + Name packs that allow you to pair a name with a fun symbol. You can choose from various themes, including sports icons, to help your child identify their gear even faster. This is particularly helpful for younger kids at kindy or sports clubs who may not be reading fluently yet. It adds a personal touch and makes their helmet, scooter, or drink bottle stand out in a busy group.
How long does shipping take within New Zealand?
We provide fast national shipping across New Zealand to ensure your family is ready for game day. While delivery times can vary depending on your location, we aim to process orders efficiently from our Auckland workshop. For those living nearby, we also offer a convenient local pickup option. This is a great way to get your labels quickly and save on shipping costs while supporting a local, family-run business.
